All Categories
Featured
Table of Contents
- – Rv Rubber Roof Maintenance Ontario, CA
- – OCRV Center
- – Rubber Roof For Camper Ontario, CA
- – Class C Rv Roof Repair Ontario, CA
- – Rv Rubber Roof Replacement Cost Ontario, CA
- – Class C Rv Roof Repair Ontario, CA
- – Epdm Rv Roof Repair Ontario, CA
- – Rv Roof Repair Ontario, CA
- – Rv Roof Replacement Ontario, CA
- – Rv Rubber Roof Replacement Cost Ontario, CA
- – Rv Trailer Roof Repair Ontario, CA
- – Rv Fiberglass Roof Repair Ontario, CA
- – Roof Repair For Rv Ontario, CA
- – Rv Roof Replacement Ontario, CA
- – OCRV Center
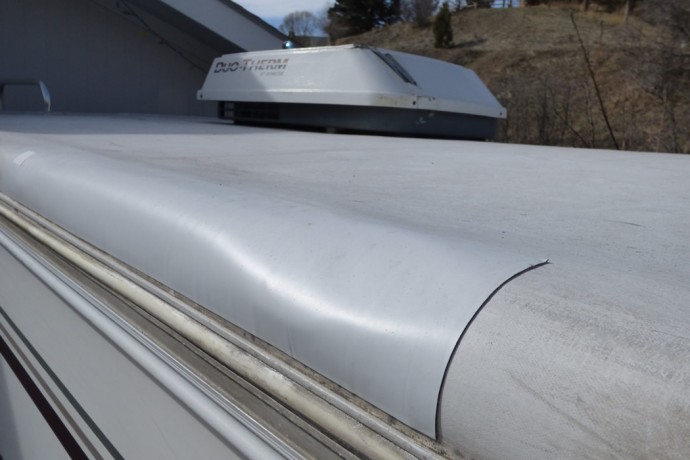
Rv Rubber Roof Maintenance Ontario, CA
He walks you tip by step through the straightforward process for patching and strengthening TPO recreational vehicle roofing liner with rubber tape strips, which you can get from almost any type of trustworthy dealer. Dicor makes a great set that Dave constantly advises. In this instance, the recreational vehicle's TV antenna has actually worn little holes right into the TPO RV roofing system, so to prevent gurgling under the membrane layer from rain and sunlight damages, Dave utilizes these rubber spots to cover the holes and maintain the roofline watertight.
Take benefit of Dave's professional suggestions to protect against that small cut on your TPO Motor home roof covering from turning into an expensive migraine! Once we're up on top below, we cleansed this roof covering and we found a couple of spots, we see right below where this roofing antenna comes down in.
Rubber Roof For Camper Ontario, CA
It's simply a rubber, the old design is simply like this, and it obtains chalked white, it'll begin to wear away, however I get any type of kind of dampness under here and it's gon na begin to function in. Currently, these 2 areas happen ahead from the antenna, as this comes down here and it's using right into 'em.

And I'm gon na place this in there simply to give it a little bit if support to make sure that I do not pierce that in future so. Got one right here, one right below, so I'm just gon na take and reduce this about 2 sizes, right there. And this just takes place to be a, a leakages, Dicor makes it, DiSeal they call it, same type of material, and it simply has a flap on here.
Membrane layer can be glued either side down. Membrane has to be set up onto tidy wooden surface, do not set up on top of existing membrane, glue, etc. Eliminate all particles off roofing with air hose pipe.
That is, fold it in half so half of the roofing system is exposed. Apply sticky in a wet film density of 8-10 mils with a short-napped paint roller to the exposed fifty percent of the roof covering outdoor decking, brush can be utilized but is extra challenging.
Class C Rv Roof Repair Ontario, CA
Different method, standard membrane layer in place making use of" staples 3"-5" apart then use bar. If roof-edge moldings are not set up on roof during this time membrane layer will peel-up as drying out.
Both sides of the front and rear roofing molding should be sealed with caulk/sealant (Rv Trailer Rubber Roof Repair Ontario). A minimum 3/8" grain will help many applications. Openings & Vents and Device Installation1. Utilizing an energy knife "x" cut all roofing system openings. Ensure you round all 90-degree edges to remove the possibility of running cuts.
There is no demand to spread out the sealer as you are applying it. * Butyl tape offers the "Main Seal" against water seepage or penetration in these membrane roofing settings up.
Rv Rubber Roof Replacement Cost Ontario, CA
Diluent Water, if needed. Usage as received. Clean-up needs only cozy water.
Eye get in touch with If item calls eye, flush with water for at least 15 mins and seek clinical interest right away. Skin get in touch with If item get in touches with skin, laundry affected area with soap and water.
Tons sealer cartridge in caulking weapon. Area nozzle right into joint and apply sealant right into space. Clean hands and devices extensively before washing with soap and water.
In case of eye get in touch with flush eyes with water for 15 mins and call a medical professional. In instance of skin get in touch with, extensively clean skin with soap and water.
Class C Rv Roof Repair Ontario, CA
Some motor home fixings can be briefly put on hold, yet a motor home roofing system fixing is NOT one of them. Stopping working to repair damage to your recreational vehicle's roof can create an irritating and pricey collection of conditions that will just worsen with time. Because roofing system repair service is such a vital item of recreational vehicle maintenance, we're sharing some crucial pointers for finding and fixing RV roofing system holes.
The ever-changing setting can trigger caulking and seals to increase and contract continuously, which can ultimately result in openings, cracks, or voids in the roof. Holes can additionally take place when you're on the step. A tree branch might scratch and puncture the roof if you were to underestimate the height of a tree arm or leg.
If your motor home occurs to be parked there at the time, your RV roofing system can sustain comprehensive damages. Not all Motor homes have the same kind of roofing, certainly. The 5 most usual sorts of motor home roofing are EPDM, TPO, PVC, fiberglass, and light weight aluminum. Allow's have a look at some information, consisting of the pros and disadvantages of each: EPDM, TPO, and PVC are all generally referred to as "rubber roofs," although they're not similar items.
TPO roofs are available in a variety of thicknesses, relying on the supplier's specs. Whether or not the thicker product is more effective over the long run appears to be a warm subject in recreational vehicle discussion forums. TPO roof coverings have a laminate cover that helps maintain them from damaging and developing splits.
Epdm Rv Roof Repair Ontario, CA
It can also be secured with solvent welding and affixed with adhesives. For an even much more comprehensive take a look at the numerous sorts of materials made use of for motor home roof coverings, look into PVC vs TPO vs EPDM Recreational Vehicle Roof Options: Which Is the very best Option? Fiberglass is one more basic recreational vehicle roof product that's exceptionally resilient.
And be particularly mindful if your roof is wet to make sure that you don't slip and diminish! A quick check of the sealant around vents, fans, photovoltaic panels, a/c unit, and antennas every thirty days or two keeps our RV roofing system in wonderful condition, staying clear of potentially pricey leakages. This Dicor sealant has fractured drastically sufficient that it can quickly be permitting water to penetrate with the roof and requires to be cleansed and re-sealed.
Clearing your Motor home's roofing of unsafe substances is one of the finest preventative actions you can take. You'll desire to do a general sweeping of your RV's roof to get rid of excess leaves and debris.
Rv Roof Repair Ontario, CA
Next off, spray the roof with clean water to remove loose dust and gunk. Having a few devices handy, such as a long-handled sponge wipe or soft brush, is valuable for this process. Check your owner's manual to discover what the supplier advises for cleaning your recreational vehicle, and the roofing system specifically.
Rubber roofing cleaners can also function well with fiberglass and aluminum roofings, but make sure to ascertain any type of warnings on the packaging to validate prior to buying. Throughout the cleansing procedure, offer added focus to areas where mold, mold, tree sap, bird droppings, or various other spots are existing. Wash thoroughly and commonly to avoid residue and grime build-up.
Rv Roof Replacement Ontario, CA
It comes in a number of various combinations of width & size, and several different shades: Clear your metal Motor home roofing system of any type of particles prior to you begin a repair service. Examine the repair service area carefully and take note of what's around it. The key is to make sure any joints are totally covered by the tape, overlapping if needed.
Rv Rubber Roof Replacement Cost Ontario, CA
You're likewise at their grace in terms of the repair service timeline. If you're convenient, it's feasible to repair small fractures and blemishes in a fiberglass roofing.
Sand the broken location to give a smooth surface area for repair sealers. If you're certain, you can even use fiberglass resin, and fiberglass cloth if required, to make the repair service yourself. For the majority of minor damages, Eternabond is a terrific backup, which just regarding anybody can use. We can not overemphasize the relevance of preventative maintenance.
Rv Trailer Roof Repair Ontario, CA
Note that the service warranty on your roofing may depend upon having your RV examined each year and evidence that you've been doing preventative upkeep. Preserving your recreational vehicle roof seals is important to avoid a leak and major damages. The joint where the rubber roof covering met the sidewalls permitted water to permeate below, doing substantial (and costly) damages to the foundation.
Among one of the most important abilities you can master for preserving your recreational vehicle is roofing fixing. It's very easy to disregard damage to a recreational vehicle roofing, yet it is just one of one of the most important aspects of camper upkeep. The majority of individuals that have actually been RVing for any type of length of time have ended up being familiar with the fact that they will have to do some repair and maintenance on their own eventually.
When it concerns delaying recreational vehicle repair and maintenance, one of the most awful points that can happen is water damages. When there's a problem with your roof covering, it takes place promptly (Rv Trailer Rubber Roof Repair Ontario). Water damage can be avoided or minimized by fixing the leak yourself. Aside from that, there's a sense of achievement in doing points oneself.
Rv Fiberglass Roof Repair Ontario, CA
These can degrade the roofing material gradually, damaging it. There are cleansers made especially for RV roofings and each sort of product. If you're functioning on a broad area, tape off the rest of your recreational vehicle and cover it with plastic to stop roof covering cleansers or sealers from trickling down the sides.
One more point that all motor home roofings have in usual is the kind of repair services that they can require. The sealer, joints, and spot openings and splits are the three things you can mend. If your EPDM or TPO rubber roofing system seems half-cracked or chalky, a fresh layer of sealer is what it requires.
When purchasing the rubber roofing layers or sealants, maintain your RV's dimensions in mind to ensure you get the appropriate quantity. After washing the entire roofing and allowing it to completely dry, use a layer of paint to the roofing system making use of a roller. Rv Trailer Rubber Roof Repair Ontario. See to it to review and comply with the guidelines on the sealant package for optimal prep work
A patch will certainly be needed if you find a little leak or tear on your RV roofing system. Thankfully, manufacturers have produced fixings and recreational vehicle roof adhesives that are straightforward to apply and lasting. A lot of patches need little prep work aside from cleaning up the damaged area and applying the spot over it, much like a band-aid.
Roof Repair For Rv Ontario, CA
Fiberglass roofing systems' top layer, like RV rubber roof coverings', can oxidize with time, providing a half-cracked, chalky look. Remove any kind of loosened, curled portions of the coating before cleaning and sand the roofing's surface making use of penalty to medium grit sandpaper afterwards. The finishing will stick far better to a slightly abraded surface area.
After the area has actually been smoothed and cleaned, add fiberglass spots and adhesive layer by layer, as directed by the repair work set. At the end, coat your motor home with a sealant to the project and redecorate the area as needed. The resealing of aluminum and other steel RV roofs is made with a certain covering produced a light weight aluminum roofing material.
The easiest approach to fix a steel roof covering with more serious damages is to change the steel panel, which is a treatment that might differ based on your motor home. You could be able to repair your steel roof covering using a peel-and-stick patch relying on the degree of the damage. Ensure you select one that is specifically intended for metal roofings, as the sticky chemistry differs.
Rv Roof Replacement Ontario, CA
A close friend requires to relocate into it pretty fast. I'm thinking about using 'blue board' foam insulation, between the 'rafters' to hold up the roofing material (which is currently sagging down) and make the roofing drain. I will certainly likewise have to patch a couple small openings where a tree branch came down on the roof covering (water dripping in these holes is what decomposed the plywood) and a few other tiny areas where the rubber is doing negative.
I'm trying to find various approaches. Any kind of experiences and suggestions on fixing a camper roof covering? Thx-Ace.
They took until last week to do it. The consumer was extremely distressed due to the fact that they had Springtime Break outdoor camping strategies, and we really did not recognize if we 'd be able to obtain the repair services done in time due to all the delays.
OCRV Center
Address: 23281 La Palma Ave Yorba Linda, CA 92887Phone: (714) 909-1444
Email: [email protected]
OCRV Center
Yet he called Progressive and has to have been not-so-nice since he got the adjustor's supervisor included. When the employer male spoke to the customer, he was playing it up huge. He said in order to get the fixings done as soon as possible so they might make their trip, we could order parts overnighted and they would certainly cover it.
Rv Rubber Roof Maintenance Ontario, CARv Roof Replacement Ontario, CA
Best Rv Roof Repair Ontario, CA
Rv Trailer Roof Repair Ontario, CA
Rubber Roofing For Rv Ontario, CA
Rubber Roof Installation Ontario, CA
Repair Rv Roof Leak Ontario, CA
Best Rv Roof Repair Ontario, CA
Rv Roof Repair Fiberglass Ontario, CA
Resealing Rv Roof Ontario, CA
Epdm Rv Roof Repair Ontario, CA
Rv Roof Replacement Ontario, CA
Best Rv Roof Repair Ontario, CA
Repair Rv Roof Ontario, CA
Rv Slide Out Roof Repair Ontario, CA
Replace Rv Roof Ontario, CA
Rv Rubber Roof Maintenance Ontario, CA
Rv Roof Leak Repair Near Me Ontario, CA
Rubber Roofing For Campers Ontario, CA
Rv Rubber Roof Maintenance Ontario, CA
Rubber Roof Installation Ontario, CA
Rubber Roof For Rv Ontario, CA
Rv Roof Leak Repair Near Me Ontario, CA
Replace Rv Roof Ontario, CA
Rv Roof Maintenance Ontario, CA
Rv Rubber Roof Replacement Cost Ontario, CA
Rubber Roofing For Campers Ontario, CA
Rubber Roof For Rv Ontario, CA
Rubber Roof Installation Ontario, CA
Class C Rv Roof Repair Ontario, CA
Best Rv Roof Repair Ontario, CA
Resealing Rv Roof Ontario, CA
Rv Roof Repair Service Near Me Ontario, CA
Rv Roof Repair Near Me Ontario, CA
Resealing Rv Roof Ontario, CA
Rv Fiberglass Roof Repair Ontario, CA
Rv Trailer Rubber Roof Repair Ontario, CA
Motorhome Roof Replacement Ontario, CA
Roof Repair For Rv Ontario, CA
Rubber Roof Installation Ontario, CA
Roof Repair For Rv Ontario, CA
Rv Rubber Roof Maintenance Ontario, CA
Rv Roof Leak Repair Near Me Ontario, CA
Rv Rubber Roof Repair Ontario, CA
Repair Rv Roof Leak Ontario, CA
Rv Roof Repair Fiberglass Ontario, CA
Rv Rubber Roof Maintenance Ontario, CA
Repair Rv Roof Leak Ontario, CA
Rv Roof Repair Near Me Ontario, CA
Repair Rv Roof Leak Ontario, CA
Rv Roof Leak Repair Near Me Ontario, CA
Best Rv Roof Repair Ontario, CA
Rv Trailer Rubber Roof Repair Ontario, CA
Rv Roof Leak Repair Near Me Ontario, CA
Rubber Roof Installation Ontario, CA
Motorhome Roof Replacement Ontario, CA
Roof Repair For Rv Ontario, CA
Resealing Rv Roof Ontario, CA
Resealing Rv Roof Ontario, CA
Best Rv Roof Repair Ontario, CA
Repair Rv Roof Leak Ontario, CA
Rv Rubber Roof Repair Ontario, CA
Rv Trailer Roof Repair Ontario, CA
Motorhome Roof Replacement Ontario, CA
Best Rv Roof Repair Ontario, CA
Rv Roof Repair Service Near Me Ontario, CA
Rv Roof Leak Repair Ontario, CA
Rv Roof Leak Repair Ontario, CA
Rubber Roof Installation Ontario, CA
Rv Roof Replacement Ontario, CA
Rv Roof Repair Near Me Ontario, CA
Repair Rv Roof Ontario, CA
Rv Trailer Roof Repair Ontario, CA
Rv Roof Replacement Ontario, CA
Rv Rubber Roof Repair Ontario, CA
Class C Rv Roof Repair Ontario, CA
Rv Rubber Roof Maintenance Ontario, CA
Rubber Roof For Camper Ontario, CA
Find Seo Package Ontario, CA
Near Me Seo Ontario, CA
OCRV Center
Table of Contents
- – Rv Rubber Roof Maintenance Ontario, CA
- – OCRV Center
- – Rubber Roof For Camper Ontario, CA
- – Class C Rv Roof Repair Ontario, CA
- – Rv Rubber Roof Replacement Cost Ontario, CA
- – Class C Rv Roof Repair Ontario, CA
- – Epdm Rv Roof Repair Ontario, CA
- – Rv Roof Repair Ontario, CA
- – Rv Roof Replacement Ontario, CA
- – Rv Rubber Roof Replacement Cost Ontario, CA
- – Rv Trailer Roof Repair Ontario, CA
- – Rv Fiberglass Roof Repair Ontario, CA
- – Roof Repair For Rv Ontario, CA
- – Rv Roof Replacement Ontario, CA
- – OCRV Center
Latest Posts
Employee Benefits Company Laguna Hills
Commercial Swamp Cooler Repair Altadena
Evaporative Cooling Repair Near Me Los Angeles County
More
Latest Posts
Employee Benefits Company Laguna Hills
Commercial Swamp Cooler Repair Altadena
Evaporative Cooling Repair Near Me Los Angeles County