All Categories
Featured
Table of Contents
- – Rubber Roof For Rv Pomona, CA
- – OCRV Center
- – Rv Roof Repair Near Me Pomona, CA
- – Rv Trailer Rubber Roof Repair Pomona, CA
- – Rubber Roofing For Campers Pomona, CA
- – Rv Trailer Roof Repair Pomona, CA
- – Best Rv Roof Repair Pomona, CA
- – Rubber Roof For Camper Pomona, CA
- – Rv Rubber Roof Replacement Cost Pomona, CA
- – Rv Roof Leak Repair Near Me Pomona, CA
- – Epdm Rv Roof Repair Pomona, CA
- – Rv Rubber Roof Replacement Cost Pomona, CA
- – Rv Rubber Roof Replacement Pomona, CA
- – Rv Trailer Roof Repair Pomona, CA
- – Class C Rv Roof Repair Pomona, CA
- – OCRV Center
Rubber Roof For Rv Pomona, CA
Depending on the state of the roofing system's rips and splits, you might require to complete a patch fixing or replace the whole roof covering. Pooled water and color urge the growth of mold and mildew and mold, which can be difficult to clean up from a recreational vehicle roofing system. RV roof coverings can oxidize for many years.
Motor home roofs with poor drain have reduced locations that gather water from cleaning or rains. Deterioration can produce roof top quality concerns that protect against coatings from adhering to the roofing.
Rv Roof Repair Near Me Pomona, CA
Carrying out RV roofing upkeep consistently offers a number of advantages: Though normal maintenance requires you to spend time and cash into cleaning and fixing your roof, you will conserve much more in the lengthy run. Maintenance helps your RV last much longer by repairing small problems before they become major troubles. All sorts of climate can trigger deterioration on your roof.
A well-kept RV is normally a lot more important than one with a leaky roof covering. You will certainly require these devices and products: Roofing sealer protects the roofing system of your Motor home from harmful UV rays.

RVs that have a built-in ladder normally have a walkable roof covering. Furthermore, be mindful not to step on the roof covering cross competes and watch for barriers when on the Motor home roofing for your safety.
Rv Trailer Rubber Roof Repair Pomona, CA
Cleaning your recreational vehicle roofing a number of times a year eliminates the debris and avoids mold from holding and triggering further damages. Follow these steps to cleanse your RV's roof: Move particles off the roofing system, especially in the areas around the roof fixtures. Use a tube and water to rinse the roofing.
You can use a cleaning product designed for Motor homes or make your very own cleaner making use of products you already carry hand. If the dirt and stains are set in, let the cleaner sit for a couple of mins. Rub the roof covering with a brush, relocating in circular motions. If needed, add even more cleaner and scrub till the roofing system is tidy.
This product has a mild rough to get rid of the oxidation and can be buffed until it shines. A UV sealant or wax shields the motor home roofing system from UV rays, as direct exposure to the sun can make the roof covering product crack and leakage. This sealant likewise makes the roof covering shiny and avoids black streaks from basing on the wall surfaces.
Rubber Roofing For Campers Pomona, CA
Some RV insurance policy plans anticipate a roofing system replacement every 10 to 15 years. EternaBond tape is one method for RV roof covering repair work. This tape covers small tears and roof and wall surface separations alike, producing a leak-proof seal that prevents water from getting involved in your RV. After reducing the tape to size, leave a large margin around the tear and press it into area, making certain the item is laid flat versus the surface.
This experience with outdoor camping prolongs to caring for a Motor home. KOA's valuable staff are trained and knowledgeable in Recreational vehicle maintenance ideal practices, from the roof covering to the tires.
Founded in Billings, MT in 1962, KOA's family members of campground brand names KOA Trip, KOA Holiday and KOA Hotel today serve even more than a million camping households every year. KOA is committed to "linking people to the outdoors and each other" by giving individuals with a variety of camping experiences and the info they need to maximize their outdoor camping trip.
There are several reasons you ought to frequently recoat your RV roofing system, securing it versus not just water damage, but sun, wind, and use and tear. Like any sort of motor lorry, motor home roofings are developed to stand up to hard climate, from snow to hail to a deluge. The roof covering product can still use out over time.
Rv Trailer Roof Repair Pomona, CA
When you use Fluid Rubber Sealer products, make certain to very carefully comply with the application guidelines. These will certainly show how long the product takes to cure to make sure that you can set up the application around climate patterns where you live. You ought to evaluate your motor home roofing et cetera of the car every six months to catch tiny problems before they become huge, costly ones.
Regarding every two to four years is perfect, depending on the kind of weather you have and the kind of environment you drive with on a normal basis. Certain type of climates can trigger more deterioration on the roofing system than others. And constantly, after a big storm or hefty snow, examine the roof covering for damage.
While some signs that your motor home roof is damaged or has a leak are apparent, such as water streaming in during a rainstorm, other signs of damage may not be as readily noticeable. Recognizing what to seek can make your evaluations a lot more reliable and bring your attention to problems when they're little adequate to be a relatively quick and low-cost repair work.

And, when you make use of Liquid Rubber Sealcoat items, you know that you're using the most effective items with the strongest reputation. Rv Roof Repair Service Near Me Pomona.
Best Rv Roof Repair Pomona, CA
The idea of changing your RV's roofing system may be on top of your potential RVing nightmares. The entire process can be complicated, costly, and time consuming. However, if you enter recognizing what to expect, it will be much less demanding, and you'll wind up with a shiny new roofing system supplying satisfaction out on the road.
Luckily, my Motor home roof covering substitute went easier than I prepared for. Just how do you know if your roofing requires to be replaced?
Rubber Roof For Camper Pomona, CA
Inside damages is a possible indication. Check along your ceilings and wall surfaces for soft places that might suggest moisture or water leakages. Look for bubbles in the wall treatments. Ceiling spots or patches of mildew or mold and mildew can also show water intrusion. If you find any interior damage, the following action is to identify the source of the leak.
If you have damage to your Recreational vehicle roof, an expert should identify whether you're better off repairing or changing the roofing. Roofing system substitutes are costly however provide both worth and peace of mind.
If a person else has collapsed right into your RV, their insurance policy can potentially cover the substitute. If your warranty or insurance coverage doesn't cover your roofing system replacement, you will certainly require to pay for it expense. If a service warranty or insurance covers the price, you'll just have to pay the amount of your insurance deductible.
This relates to various other circumstances where damage happens, typically while the RV isn't in operation, such as storm damage. Your future insurance rates may not rise if you're found not to be liable. Unless you're incredibly convenient, you'll likely need to find a professional to replace your RV roofing system.
Rv Rubber Roof Replacement Cost Pomona, CA
After finding a fixing store, we dropped off our travel trailer for a first evaluation. In this instance, the insurance really did not send out an insurer out for an in-person examination, however some business require you to have an adjuster look at your Motor home roof to verify the damage.
From there, the roof covering professional only used one type of roof, so we didn't have any kind of decisions to make. It might take numerous weeks or months to get your Motor home's roofing replaced.
Rv Roof Leak Repair Near Me Pomona, CA
After a few brief weeks, our roof replacement was total. A complete Motor home roof covering substitute normally costs several thousand dollars.
If you don't evaluate, reseal, and repair your RV roof covering consistently, you will wind up with some pretty awful water damages. This is something that will rapidly decrease the value of your recreational vehicle and could also make it unusable. Taking care of your RV roofing system is something you can most likely do all on your very own.
After concerning 10 years, it will also be essential to reseal the whole roof. To do this, you'll need to climb up onto the roofing system, but be very cautious when you do.
Epdm Rv Roof Repair Pomona, CA
Next off, you'll intend to clean your roofing thoroughly, so as to eliminate any kind of dirt bits. You can utilize a lengthy managed brush for this, but never utilize a cleaner that has oil solvents or citrus active ingredients on your rubber or plastic roof covering. These kinds of cleansers will certainly trigger irreversible damage to the surface.
While you're cleansing, scrape off any debris or old roofing system material, however be careful while you do this as you can conveniently lengthen a tear, and even punch an opening through the roof. You need to after that dry the roofing as best as you can. Note: Rubber recreational vehicle roofs can be really slippery when damp.
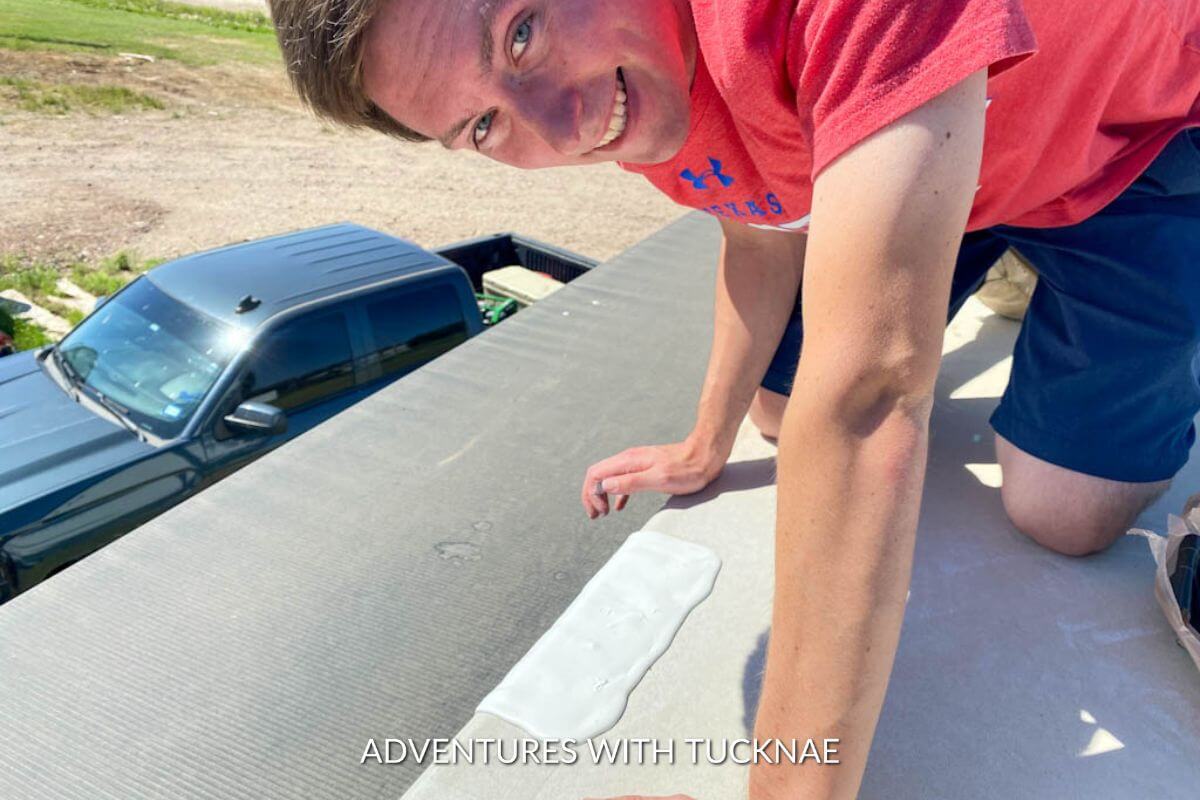
After the roofing system is tidy, you are going to intend to examine the seams for holes, fractures or peeling, so you can reseal anywhere essential. You'll desire to make a factor of resealing all joints as soon as a year whether or not they show signs of wear.
Rv Rubber Roof Replacement Cost Pomona, CA
When it pertains to picking the best recreational vehicle roof sealer, you'll want to consider whether you are fixing a tear, resealing a joint, or sealing the entire roofing. The kind of roofing system is also important to bear in mind, as motor home roofing systems can be made from either EPDM (Ethylene Propylene Diene Monomer) and TPO (Thermal Polyolefin) and you need the product you use to be suitable with your roof kind.
Dicor Self-Leveling Lap Sealant is an excellent choice for going over old roofing seals. It can be utilized for spot securing or to reseal every seam on the motor home roofing system. Simply cleanse the location well and apply with a caulk weapon. The things will level itself out, so don't fret about that part.
Rv Rubber Roof Replacement Pomona, CA
This primes and layers the roofing to create a charming, protective coating that'll last for years. Lastly, there is the Dicor TPO Roofing Covering System. Similar to the EPDM system provided above, this covering product will certainly cover your TPO roofing and assist it last one more one decade. Before EPDM and TPO, metal was the material of choice for motor home roofings.
The abovementioned EternaBond is still king when it comes to repairing tiny problems on a metal roofing. Motor home steel roofs do require to be completely resealed from time to time.
Make sure to reseal whenever essential and make a point of resealing all of the seams as soon as every 12 months or so. You'll need to remove the existing roof covering.
Rv Trailer Roof Repair Pomona, CA
Replace damaged pieces. Once the plywood is ready, it's best to clean the plywood with something like mineral spirits to eliminate any kind of kind of debris.
Do this in small chunks the whole time the roof covering, cutting holes in the rubber roof for any kind of attribute that will go back right into the roof. Ultimately, change your roof's fans, skylights, and AC system. Seal each joint with the lap sealant we pointed out earlier. You'll also desire to use lap sealant to the sides of the roof covering.
In this message, we wish to show to you how to do it yourself recreational vehicle roofing repair work. Staying in a motor home has incredible moments, however things additionally fail. Knowing exactly how to DIY a lot of the things that can break or ruin will save you not only a lot of cash on recreational vehicle repairs yet could also save you a great deal of possible time in the shop! This message might consist of affiliate links.
I might receive a little compensation when you make an acquisition utilizing my link. Sometimes, though, we discover ourselves in unintended circumstances. This is just how we finished up with a few little tears on the roofing of our RV.
Class C Rv Roof Repair Pomona, CA
We assumed we were free from the branches, yet we ended up catching a few of them on the much left side of the roof. There were a total amount of 4-5 small openings in the side of the roofing system. At first, we really did not inspect the roofing since we really did not believe we hit anything.
OCRV Center
Address: 23281 La Palma Ave Yorba Linda, CA 92887Phone: (714) 909-1444
Email: [email protected]
OCRV Center
One of the tears in our motor home roof covering A couple of weeks later, we withstood a severe thunderstorm and a LOT of rainfall. Throughout the tornado, we located that we had a little quantity of water dripping via among the light fixtures in the bathroom. Luckily, we did not wind up with any permanent water damages.
Resealing Rv Roof Pomona, CAEpdm Rv Roof Repair Pomona, CA
Rv Roof Repair Fiberglass Pomona, CA
Rv Roof Repair Pomona, CA
Replace Rv Roof Pomona, CA
Motorhome Roof Replacement Pomona, CA
Replace Rv Roof Pomona, CA
Rv Roof Repair Fiberglass Pomona, CA
Rv Roof Leak Repair Pomona, CA
Rv Roof Repair Near Me Pomona, CA
Best Rv Roof Repair Pomona, CA
Rv Roof Leak Repair Pomona, CA
Rv Trailer Roof Repair Pomona, CA
Epdm Rv Roof Repair Pomona, CA
Rv Roof Maintenance Pomona, CA
Rv Rubber Roof Replacement Pomona, CA
Roof Repair For Rv Pomona, CA
Rv Fiberglass Roof Repair Pomona, CA
Rv Rubber Roof Replacement Cost Pomona, CA
Rv Rubber Roof Replacement Pomona, CA
Rv Trailer Roof Repair Pomona, CA
Roof Repair For Rv Pomona, CA
Rubber Roof For Camper Pomona, CA
Rv Rubber Roof Maintenance Pomona, CA
Rv Roof Repair Pomona, CA
Rubber Roof For Camper Pomona, CA
Rv Roof Repair Pomona, CA
Repair Rv Roof Leak Pomona, CA
Rv Trailer Rubber Roof Repair Pomona, CA
Rubber Roof For Camper Pomona, CA
Rv Rubber Roof Maintenance Pomona, CA
Replace Rv Roof Pomona, CA
Rubber Roofing For Rv Pomona, CA
Resealing Rv Roof Pomona, CA
Rv Roof Repair Fiberglass Pomona, CA
Rv Roof Repair Fiberglass Pomona, CA
Rv Roof Repair Near Me Pomona, CA
Rv Rubber Roof Replacement Pomona, CA
Roof Repair For Rv Pomona, CA
Replace Rv Roof Pomona, CA
Motorhome Roof Replacement Pomona, CA
Repair Rv Roof Pomona, CA
Rv Roof Repair Fiberglass Pomona, CA
Repair Rv Roof Pomona, CA
Rv Trailer Rubber Roof Repair Pomona, CA
Epdm Rv Roof Repair Pomona, CA
Rv Slide Out Roof Repair Pomona, CA
Motorhome Roof Replacement Pomona, CA
Rv Roof Leak Repair Pomona, CA
Rubber Roofing For Campers Pomona, CA
Repair Rv Roof Pomona, CA
Repair Rv Roof Pomona, CA
Rv Rubber Roof Replacement Cost Pomona, CA
Resealing Rv Roof Pomona, CA
Motorhome Roof Replacement Pomona, CA
Rv Roof Repair Service Near Me Pomona, CA
Rv Rubber Roof Replacement Pomona, CA
Rv Roof Repair Fiberglass Pomona, CA
Repair Rv Roof Pomona, CA
Rv Roof Leak Repair Pomona, CA
Best Rv Roof Repair Pomona, CA
Rv Roof Repair Fiberglass Pomona, CA
Rubber Roofing For Campers Pomona, CA
Rv Rubber Roof Replacement Pomona, CA
Repair Rv Roof Pomona, CA
Rv Roof Leak Repair Near Me Pomona, CA
Rv Roof Leak Repair Pomona, CA
Rubber Roof Installation Pomona, CA
Rubber Roof Installation Pomona, CA
Rv Rubber Roof Replacement Pomona, CA
Rubber Roofing For Rv Pomona, CA
Resealing Rv Roof Pomona, CA
Repair Rv Roof Pomona, CA
Best Rv Roof Repair Pomona, CA
Rv Rubber Roof Repair Pomona, CA
Rv Roof Repair Fiberglass Pomona, CA
Rv Roof Leak Repair Near Me Pomona, CA
Repair Rv Roof Leak Pomona, CA
Close To Me Seo Firm Pomona, CA
Affordable Seo Specialist Pomona, CA
OCRV Center
Table of Contents
- – Rubber Roof For Rv Pomona, CA
- – OCRV Center
- – Rv Roof Repair Near Me Pomona, CA
- – Rv Trailer Rubber Roof Repair Pomona, CA
- – Rubber Roofing For Campers Pomona, CA
- – Rv Trailer Roof Repair Pomona, CA
- – Best Rv Roof Repair Pomona, CA
- – Rubber Roof For Camper Pomona, CA
- – Rv Rubber Roof Replacement Cost Pomona, CA
- – Rv Roof Leak Repair Near Me Pomona, CA
- – Epdm Rv Roof Repair Pomona, CA
- – Rv Rubber Roof Replacement Cost Pomona, CA
- – Rv Rubber Roof Replacement Pomona, CA
- – Rv Trailer Roof Repair Pomona, CA
- – Class C Rv Roof Repair Pomona, CA
- – OCRV Center
Latest Posts
Employee Benefits Company Laguna Hills
Commercial Swamp Cooler Repair Altadena
Evaporative Cooling Repair Near Me Los Angeles County
More
Latest Posts
Employee Benefits Company Laguna Hills
Commercial Swamp Cooler Repair Altadena
Evaporative Cooling Repair Near Me Los Angeles County