All Categories
Featured
Table of Contents
- – OCRV Center
- – Why Is My RV AC Not Cooling Properly in Califo...
- – Common Causes of Poor Cooling in Motorhomes
- – Dirty Coils and Filters Blocking Airflow
- – Low Refrigerant from Leaks or Normal Wear
- – Signs Your Unit Needs Immediate Attention
- – Warm Air from Vents Instead of Cold
- – Unusual Noises or Frequent Short Cycling
- – How Do I Fix RV AC Blowing Warm Air?
- – Step-by-Step Troubleshooting at Home
- – Check Power Supply and Breaker Status First
- – Inspect, Clean, or Replace Air Filters
- – When to Call for Professional Help
- – Suspected Capacitor or Compressor Failure
- – What Causes RV AC Not Turning On?
- – Electrical and Thermostat Issues
- – Tripped Breakers or Loose Connections
- – Fuse and Control Board Problems
- – Common RV Air Conditioner Problems and Proven ...
- – RV AC Capacitor Failure Symptoms and Replacement
- – Safe Testing Methods
- – Typical Cost Range ($400–$1,200)
- – Refrigerant Recharge: When It's Needed and Why
- – Identifying Low Refrigerant Signs
- – RV Rooftop AC Maintenance: Essential Tips for ...
- – Coil Cleaning and Fin Straightening Techniques
- – Recommended Tools and Safety Precautions
- – Gasket, Shroud, and Seal Inspection
- – Preventing Water Intrusion and Leaks
- – Dometic vs Coleman Mach vs Furrion: Brand-Spec...
- – Dometic Common Repairs and Solutions
- – Control Board and Thermostat Calibration
- – Coleman Mach Troubleshooting and Fixes
- – Fan Motor and Capacitor Challenges
- – Furrion Modern Unit Maintenance Needs
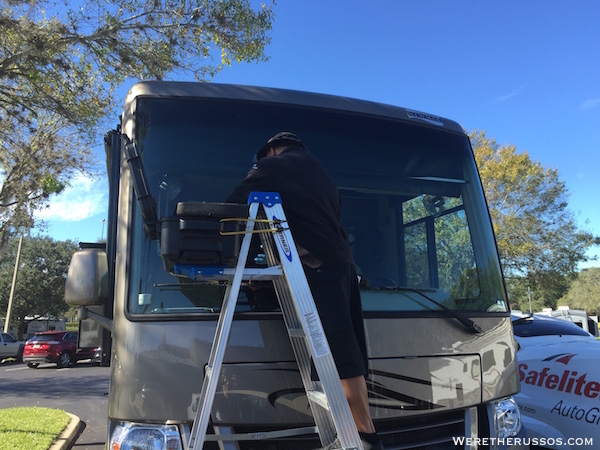
- – Mobile RV AC Repair: Benefits for California M...
- – On-Site Diagnostics and Immediate Repairs
- – Eliminating Towing and Downtime
- – Emergency Service During Heat Waves
- – RV AC Repair Costs in California: What to Expect
- – Breakdown by Repair Type
- – Diagnostic and Minor Service Fees
- – Full System Replacement Considerations
- – Local RV AC Repair Near You: Serving Southern ...
- – Extensive Coverage in Key Areas
- – Why Choosing Local Experts Matters
- – We Can Help! Contact Us Today.
- – OCRV Center
RV AC repair remains a top-priority service motorhome owners seek when journeying in California. The state’s varied weather conditions—from moist shorelines to dry desert interiors—impose heavy demands rooftop air conditioning units, resulting in common breakdowns that affect both comfort and on-road safety. Owners regularly seek for help with why is my RV AC not cooling, how to fix RV AC blowing warm air, or RV AC not turning on because these problems create immediate discomfort, especially during peak summer journeys or prolonged camping. A true one-stop repair shop addresses these challenges more effectively than fragmented vendors by evaluating the AC unit together with connected components such as electrical wiring, roof seals, ductwork, and thermostats in one visit. This unified method cuts down on multiple trips, minimizes overlooked concerns, and delivers long-lasting results that keep motorhomes road-ready. Integrated service also offers straightforward information, transparent pricing, and forward-thinking tips that protect long-term value in the vehicle.
Many motorhome owners begin with short-term self-repairs or consult separate technicians only to encounter recurring malfunctions or escalating repair costs. One-stop facilities break this pattern by providing end-to-end knowledge under one roof. Technicians experienced in various systems can determine how capacitor wear influences total power requirements or how a small roof seal failure leads to coil freezing. The outcome is quicker resolution, reduced follow-up visits, and greater confidence on the road. This unified method provides special benefits for full-time RVers, groups organizing long vacations, or people counting on their motorhome for dependable comfort amid California’s variable climate. Choosing an all-in-one shop assures skilled attention of every part of RV air conditioner repair, from basic maintenance to complex part swaps. For ongoing care options, explore the RV maintenance services.
Why Is My RV AC Not Cooling Properly in California's Heat?
The state’s strong sun exposure and high heat levels impose heavy loads on RV rooftop AC systems fitted to the roof of RVs. RVs left in direct sunlight or driven through inland areas often experience diminished cooling power as thermal load exceeds system capacity. Dust particles, road grit, pollen, and airborne contaminants rapidly build up on condenser and evaporator coils, impeding heat dissipation and causing just tepid or warm vent output. Gradual refrigerant loss through minor leaks or component permeation lowers pressure levels, making the compressor work longer without delivering enough cold airflow. Rv Windshield Repair Santa Ana. Owners notice the change right away—sticky skin, foggy windows, uneasy sleep—and increasing frustration as interior temperatures climb even while the unit operates nonstop. These situations highlight the need of prompt RV AC service to maintain secure and pleasant living spaces during travel and camping. For related preventive work, see the RV roof repair services
Common Causes of Poor Cooling in Motorhomes
Collected debris on coils and blocked filters serve as the main contributors for diminished cooling output. Environmental contaminants build up rapidly while traveling. Obstructing fin surfaces and limiting the system’s heat rejection capability. Low refrigerant commonly arises from microscopic leaks at fittings, gaskets, or coil sections that develop slowly due to ongoing vibration and thermal changes. Both conditions intensify under high external heat, where the unit must work harder to maintain set temperatures, raising energy use and hastening part wear. Periodic evaluation and deep cleaning avert these accumulations from developing into severe malfunctions. Expert care ensures thorough cleaning without damaging delicate fins or seals. More assistance for wiring problems is offered on the RV electrical services.
Dirty Coils and Filters Blocking Airflow
Coils accumulate dust, leaves, insects, and road contaminants that form an insulating layer and block efficient heat dissipation. Reduced airflow leads to evaporator icing or condenser overheating, sharply lowering overall cooling performance. Filters become clogged quickly in dusty conditions, additionally restricting return airflow and overburdening the blower. Cleaning these elements restores proper circulation and efficiency. Regular attention prevents strain on the entire system.
Low Refrigerant from Leaks or Normal Wear
Charge levels drop slowly from minor leaks or normal permeation, lowering pressure below functional range. Symptoms feature hissing at fittings or ice buildup on lines. Adding refrigerant without leak repair offers brief improvement. Qualified technicians locate and repair leaks before recharging to maintain ongoing efficiency. This process complies with EPA regulations for safe handling.
Signs Your Unit Needs Immediate Attention
Warm air from vents signals restricted airflow or low refrigerant, while grinding, rattling, or whining sounds signal mechanical deterioration in fan motors or compressors. Frequent short cycling—compressor starting and stopping quickly—indicates pressure imbalances or electrical issues that speed component fatigue. Ignoring these warnings can lead to complete failure amid peak heat. Prompt expert evaluation determines root issues and averts expensive progression.
Warm Air from Vents Instead of Cold
This symptom often stems from compressor failure to start or major airflow restriction. Owners experience no noticeable cooling despite fan running, leading to uncomfortably hot cabin spaces. Prompt assessment prevents escalation to costlier fixes such as compressor replacement.
Unusual Noises or Frequent Short Cycling
Noises point to bearing failure or unsecured elements, while short cycling demonstrates protection circuits responding to excessive pressure or voltage issues. Both decrease performance and heighten electrical system wear. Early intervention greatly increases component longevity.

Recognizing these indicators early avoids progression to major component failure such as compressor burnout. Qualified assessment correctly locates core problems and reinstates dependable cooling performance. Connect with a professional nearby service for a complimentary evaluation to restore comfort fast. Additional resources on related maintenance appear on the RV maintenance page.
How Do I Fix RV AC Blowing Warm Air?
RV AC blowing warm air ranks among the top issues because it directly removes the anticipated relief from rising temperatures. Owners look for immediate cold airflow when turning on the unit, but receive only ambient-temperature flow or even hotter vent output. This failure often stems from blocked airflow across the evaporator, wiring problems stopping compressor startup, or mechanical faults within the condensing unit. Basic at-home inspections can rule out easy causes, yet persistent symptoms typically require advanced diagnostic tools to assess refrigerant levels, capacitor status, or compressor operation. Fixing it early protects interior livability and prevents secondary harm to furnishings or electronics from extended heat exposure. For related electrical support, check RV electrical repair services.
Step-by-Step Troubleshooting at Home
Commence with the electrical supply by confirming breaker panel status and confirming shore/generator output aligns with system demands. Examine and clean or substitute cabin air filters, as blocked filters severely restrict return air and prompts coil icing or reduced performance. Verify thermostat configuration and replace batteries in wireless units to eliminate control faults or calibration shifts. Inspect visible duct runs for blockages or separations that misroute cooled air from occupied areas. These initial actions often resolve minor airflow or power delivery concerns.
Check Power Supply and Breaker Status First
Power disruptions caused by tripped breakers or faulty connections fully prevent compressor engagement. Reset breakers and measure voltage at the unit to ensure consistent power supply. Insufficient voltage overworks components and blocks startup sequences.
Inspect, Clean, or Replace Air Filters
Filters capture dust and particulates that severely restrict airflow when saturated. Fresh filters reinstate proper circulation and avert coil icing. Clean reusable types frequently in dusty travel settings to maintain efficiency.
When to Call for Professional Help
Signs of capacitor issues appear as humming with no compressor start, whereas compressor troubles may result in silence or irregular function. Low charge requires recovery equipment and leak detection that only certified technicians can legally and safely handle. Electrical diagnostics identify shorts or faulty wiring that present safety hazards if left unaddressed.
Suspected Capacitor or Compressor Failure
Capacitors provide the starting boost for motors; degradation causes humming or no reaction. Compressor malfunctions frequently involve internal windings or valves. Qualified diagnostics identify the issue without causing more harm.
Fundamental checks yield helpful insights, but expert diagnosis stops recurring issues and avoids unneeded replacements. Contact experts to secure a durable, efficient fix. Discover full solutions on the RV appliance repair page.
What Causes RV AC Not Turning On?
The moment the thermostat calls for cooling and nothing happens—no blower, no compressor sound, no cold output—anxiety builds fast. RV AC not turning on typically originates from interruptions in the power path or failures within control components. Constant road movement loosens wiring points over time, while power surges from generators or pedestals trigger safety devices. Malfunctioning thermostats fail to transmit the activation command, and internal fuses and boards experience damage from moisture or aging. These electrical faults demand thorough assessment to prevent repeated occurrences or safety risks. For additional electrical assistance, check RV electrical services.
Electrical and Thermostat Issues
Tripped circuit breakers or GFCI protection interrupt electricity, particularly after heavy usage from extra equipment. Loose or oxidized connections at the rooftop assembly or interior controls obstruct current flow to essential parts. Thermostat malfunctions include sensor drift or wiring faults that disrupt unit communication - Rv Windshield Repair Santa Ana. Verification of voltage stability and connection integrity often resolves these concerns
Tripped Breakers or Loose Connections
Breakers safeguard against overload but activate from voltage surges or shorts. Loose connections elevate resistance and generate heat buildup. Tightening and cleaning connections restores reliable power delivery.
Fuse and Control Board Problems
Fuses blown from overload need replacement once the core problem is resolved. Control boards exposed to moisture or spikes can stop working entirely, halting every function. Diagnostic testing distinguishes board faults from other electrical anomalies.
Avoid long trial-and-error that threatens more electrical issues. Book a consultation to pinpoint the precise issue and recover operation swiftly. More details on system checks are on the RV maintenance page.
Common RV Air Conditioner Problems and Proven Solutions
RV air conditioner problems consistently appear at the top of service request lists for motorhome owners, especially in regions with prolonged heat. Statistics from RV groups show that AC breakdowns make up a large portion of warranty filings and roadside calls. The blend of continuous vibration, environmental exposure, and intensive usage speeds degradation of essential elements. Common issues include uneven cooling, strange noises, frozen coils, and complete shutdowns that leave interiors unpleasantly warm.
RV AC Capacitor Failure Symptoms and Replacement
Capacitors accumulate energy to deliver the initial surge required for compressor and fan motor startup. Failure produces distinctive humming without startup or intermittent activity. Safe testing employs multimeter verification of microfarad values, with replacement requiring discharge procedures to prevent shock. Expenses usually range $400–$1,200 with labor and parts. Quick replacement eases load on remaining electrical components. For additional component service, see RV appliance services.
Safe Testing Methods
Employ insulated tools and fully discharge the capacitor before measurement. Compare readings against manufacturer specifications for precise diagnosis. Improper testing risks shock or extra component injury.
Typical Cost Range ($400–$1,200)
Pricing varies by unit rating and brand - Rv Windshield Repair Santa Ana. Labor covers safe extraction, checking, and installation. Premium parts guarantee longevity and dependable operation
Refrigerant Recharge: When It's Needed and Why
Refrigerant deficiency manifests as poor cooling, hissing sounds, or ice on lines. Only certified technicians can legally recover, evacuate, and recharge. The process includes leak locating and repair to ensure lasting recharge. Bypassing leak repair results in repeated service requirements.
Identifying Low Refrigerant Signs
Decreased cooling and ice buildup show refrigerant loss. Pressure checks confirm deficiency during assessment. Early identification prevents compressor damage from low-pressure running.
Pros with factory training and ASE certification deliver exact, durable repairs that minimize follow-up calls. Satisfaction guarantees build confidence in the results. Explore preventive options on the maintenance page.
RV Rooftop AC Maintenance: Essential Tips for Longevity
Consistent rooftop AC care significantly lengthens system durability and maintains cooling ability under tough conditions. Annual service detects deterioration prior to failure. Maintaining airflow, efficiency, and part health. Neglected systems lose 20–30% efficiency in a few seasons from accumulated debris and overlooked wear. Maintenance actions cover cleaning, inspection, and minor tuning that maintain peak system operation. Regular care lowers power use and enhances general dependability during extended use. For full preventive programs, see RV maintenance services.
Coil Cleaning and Fin Straightening Techniques
Coils accumulate dust, foliage, and road contaminants that form an insulating layer and lower heat dissipation performance. Apply factory-specified cleaners and low-pressure wash to protect fins. Straighten bent fins using a specialized comb to reinstate unrestricted airflow. Regular cleaning averts efficiency decline and extends compressor durability. Thorough procedures maintain peak performance across seasons.
Recommended Tools and Safety Precautions
Gentle brushes, approved cleaners, and fin tools ensure safe and thorough cleaning. Cut power and use protective gear while cleaning. Do not use high-pressure water that deforms fins or pushes debris deeper.
Gasket, Shroud, and Seal Inspection
Seals at the rooftop penetration break down from sun exposure and heat cycles, permitting water entry that causes corrosion or electrical faults. Check shrouds for damage and seal condition, replacing to preserve water resistance. Correct sealing maintains insulation and stops moisture-related issues. Frequent visual evaluations in seasonal maintenance identify wear quickly.
Preventing Water Intrusion and Leaks
Inspect for gaps or hardening in seals during routine evaluations. Apply approved sealants to reestablish watertight conditions. Periodic checks catch deterioration early and prevent interior damage from water penetration.
Regular preventive maintenance greatly lowers failure rates and improves efficiency. Skilled teams perform these tasks effectively, delivering reliable results owners can trust. More information is available on the RV roof repair page.
Dometic vs Coleman Mach vs Furrion: Brand-Specific RV AC Repair Insights
Each prominent RV AC brand exhibits unique repair characteristics determined by design philosophy and typical usage patterns. Knowing these variations aids owners in expecting problems and picking proper repairs. Dometic models commonly need control board work following extended thermal and vibrational stress. Coleman Mach systems often face fan motor or capacitor wear from frequent startups. Furrion models, featuring contemporary electronics, may require firmware updates or sensor maintenance. Specialized brand knowledge guarantees precise diagnosis and correct parts. For appliance-related support, visit RV appliance services.
Dometic Common Repairs and Solutions
Dometic models commonly demand control board assessment after long-term thermal and motion exposure. Thermostat calibration drifts over time, causing inaccurate temperature control. Pros apply diagnostic instruments to reprogram or change boards as needed. Routine firmware updates sustain optimal functionality across changing conditions.
Control Board and Thermostat Calibration
Control board failures result in erratic cycling or total non-operation. Calibration restores accurate sensing and control. Substitution employs factory-spec parts for compatibility and lasting performance.
Coleman Mach Troubleshooting and Fixes
Coleman Mach units often face fan motor bearing wear or capacitor degradation from startup surges. Consistent lubrication and voltage observation prevent early breakdown. Fan assemblies undergo detailed inspection during service visits.
Fan Motor and Capacitor Challenges
Bearing noise indicates approaching failure. Capacitor testing verifies capacity reduction. Prompt replacement prevents complete motor failure and electrical overload.
Furrion Modern Unit Maintenance Needs
Furrion units feature modern electronics that benefit from firmware updates and sensor maintenance. Refrigerant checks maintain correct charge in different ambient temperatures. Electronic diagnostics quickly isolate faults for efficient repair.
Specialized knowledge across brands guarantees precise diagnosis and repair. Factory-trained professionals manage every model effectively. Further brand details can be found on the appliance repair page.
Mobile RV AC Repair: Benefits for California Motorhome Owners
Mobile RV AC repair avoids the necessity of towing or trailering large RVs to a stationary facility. Technicians arrive equipped to conduct diagnostics, component replacement, and system verification directly at the campsite, residence, or roadside location. This flexibility proves especially valuable during trips or when fixed-shop access is difficult. On-site service lowers vehicle stress and owner burden while supplying expert results. For on-location repair information, check RV service offerings.
On-Site Diagnostics and Immediate Repairs
Mobile diagnostic equipment permits full assessment without major disassembly in numerous cases. Most repairs complete the same day, cutting interference with itineraries. Pros keep common parts on hand for fast resolution of frequent problems.
Eliminating Towing and Downtime
Towing substantial motorhomes introduces risk of supplementary damage and creates substantial expense. On-location repair avoids these expenses and maintains vehicle location. Quick fixes protect travel plans and owner comfort.
Emergency Service During Heat Waves
Prompt response during extreme temperature periods prevents heat-related discomfort and safeguards susceptible components from overheating damage. Urgent service receives fast scheduling to return cooling promptly.
On-site capability significantly lowers stress and downtime. Trusted professionals focus on fast, thorough fixes. Explore further mobile details on the service page.
RV AC Repair Costs in California: What to Expect
Being aware of RV AC repair expenses allows owners to budget accurately and prevent unanticipated expenses. Initial diagnostics usually cost $150 to $300 depending on complexity and travel requirements. Minor repairs such as coil cleaning, filter changes, or gasket service average $300–$800. Capacitor or fan motor repairs fall between $400 and $1,200, while full rooftop unit replacement costs $1,500–$2,500 based on BTU capacity, brand compatibility, and installation needs. Clear pricing supports smart budgeting. For pricing details on additional services, see RV maintenance pricing.
Breakdown by Repair Type
Evaluation fees include complete inspection and reporting. Minor service targets accessible components using standard replacement parts. Full replacement includes the unit, labor, and full system testing. Expenses reflect parts quality and technician skill.
Diagnostic and Minor Service Fees
Evaluations accurately identify issues. Small fixes use OEM or comparable parts for dependability. Fees remain competitive with detailed breakdowns provided upfront.
Full System Replacement Considerations
Influencing factors include compatibility with current ductwork, generator capacity, and required modifications. Expert installation ensures correct sealing and electrical connection for maximum efficiency.
Clear cost communication establishes trust. Cost-effective service preserves investment over time. More cost details are on the service page.
Local RV AC Repair Near You: Serving Southern California
Southern California’s diverse geography and climate require responsive local RV AC repair capabilities. Service encompasses Orange County areas including Anaheim, Irvine, Huntington Beach, Fullerton, Yorba Linda, and numerous surrounding communities, extending throughout Los Angeles County, Inland Empire, Riverside and San Bernardino Counties, San Diego, and Ventura areas. Convenient access near major transportation corridors supports efficient response times. Local service adapts to regional factors such as coastal corrosion or desert dust accumulation. For area-specific repair information, check Anaheim RV repair, Irvine RV repair, Chino Hills RV repair, Fullerton RV repair, and Yorba Linda RV repair.
Extensive Coverage in Key Areas
Service covers coastal, valley, and desert zones where temperature stress varies significantly. Technicians understand regional environmental factors that speed component deterioration.
Why Choosing Local Experts Matters
Local expertise provides customized solutions for humidity, dust, and temperature variations. Rapid response minimizes discomfort during peak heat periods. Proximity facilitates same-day or next-day service in most instances.
OCRV Center, 23281 La Palma Ave. Yorba Linda CA 92887, (714) 909-1444 delivers dependable local support across Southern California. Favorable location facilitates strong coverage for local RV AC repair searches in the region. Additional location-based services are available through RV repair near me pages.
We Can Help! Contact Us Today.
Picture arriving at a beautiful overlook, activating the air conditioner, and immediately experiencing refreshing cool air circulating throughout the interior—no more sticky discomfort, restless nights, or canceled plans due to heat buildup. That quick relief enables families to unwind thoroughly, share meaningful talks, rest well, and form enduring memories without concern or interruption. The emotional lift of relying on a reliable system on every trip eliminates ongoing worry, replacing concern with eagerness for upcoming trips. Owners feel renewed confidence knowing breakdowns won’t derail planned journeys.
From a logical perspective, professional RV AC repair prevents costly secondary consequences such as compressor breakdown, wiring issues, or mold from unnoticed leaks. Certified repairs maintain efficiency, reduce energy use, and extend unit lifespan, providing clear return on investment via fewer visits and lower overall expenses. Open pricing avoids uncertainty, while comprehensive diagnostics spot linked problems promptly, conserving time and funds compared to reactive repairs. Repeatable high-quality results ensure dependable operation across changing seasons and conditions.
The mobile technician team located and repaired our Dometic RV AC malfunction directly at the campground, returning full cooling power in hours—our summer schedule remained fully intact. Honest pricing and expert capacitor work gave total assurance for our extended cross-state trip. Prompt response and thorough explanations transformed a potentially stressful breakdown into a seamless experience from initial contact through completion. These genuine experiences show dependable service standards.
The satisfaction guarantee covers all repairs, delivering trust in the outcome. Comprehensive one-stop service manages the air conditioner together with electrical, roof, and ductwork systems to achieve complete reliability. Conveniently positioned near major corridors in Southern California, the team supports motorhome owners, campers, fifth wheels, trailers, and other vehicles with skill and attention. Complimentary consultations provide honest assessments and clear estimates. With over a decade of specialized experience and dedication to quality, every job focuses on repeatable high-performance results. Contact local RV AC repair specialists today at (714) 909-1444 or through the website to arrange service. Your comfortable, trustworthy motorhome travels begin with one contact. OCRV Center stands prepared to provide the solutions required for worry-free travel.
OCRV Center
Address: 23281 La Palma Ave Yorba Linda, CA 92887Phone: (714) 909-1444
Email: [email protected]
OCRV Center
Norcold Rv Refrigerator Repair Santa Ana, CA
Norcold Refrigerator Repair Santa Ana, CA
Motorhome Generator Repair Santa Ana, CA
Rv Repair Shop Near Me Santa Ana, CA
Rv Service And Repair Santa Ana, CA
Norcold Refrigerator Repair Santa Ana, CA
Rv Ac Repair Santa Ana, CA
Rv Fridge Repair Santa Ana, CA
Rv Window Repair Santa Ana, CA
Rv Engine Repair Near Me Santa Ana, CA
Rv Service And Repair Santa Ana, CA
Onan Generator Repair Santa Ana, CA
Rv Windshield Replacement Santa Ana, CA
Motorhome Generator Repair Santa Ana, CA
Emergency Rv Repair Near Me Santa Ana, CA
Norcold Refrigerator Repair Santa Ana, CA
Rv Mechanic Near Me Santa Ana, CA
Rv Windshield Repair Near Me Santa Ana, CA
Rv Air Conditioning Repair Near Me Santa Ana, CA
Rv Windshield Repair Santa Ana, CA
Rv Generator Repair Near Me Santa Ana, CA
Motorhome Generator Repair Santa Ana, CA
Rv Air Conditioning Repair Santa Ana, CA
Rv Engine Repair Near Me Santa Ana, CA
Rv Windshield Replacement Santa Ana, CA
Norcold Rv Refrigerator Repair Santa Ana, CA
Rv Air Conditioner Repair Santa Ana, CA
Rv Windshield Repair Santa Ana, CA
Dometic Refrigerator Repair Santa Ana, CA
Rv Repair Shops Near Me Santa Ana, CA
Rv Service And Repair Santa Ana, CA
Rv Repair Shops Near Me Santa Ana, CA
Rv Window Repair Santa Ana, CA
Rv Mechanic Near Me Santa Ana, CA
Motorhome Repair Shop Near Me Santa Ana, CA
Rv Air Conditioning Repair Santa Ana, CA
Rv Air Conditioner Repair Santa Ana, CA
Rv Repair Shop Near Me Santa Ana, CA
Norcold Rv Refrigerator Repair Santa Ana, CA
Rv Air Conditioning Repair Near Me Santa Ana, CA
Rv Generator Repair Near Me Santa Ana, CA
Rv Air Conditioner Repair Santa Ana, CA
Rv Window Repair Santa Ana, CA
Motorhome Repair Shop Near Me Santa Ana, CA
Rv Repair Shops Near Me Santa Ana, CA
Rv Mechanic Near Me Santa Ana, CA
Rv Window Repair Santa Ana, CA
Rv Air Conditioner Repair Santa Ana, CA
Rv Windshield Repair Near Me Santa Ana, CA
Rv Windshield Repair Near Me Santa Ana, CA
Rv A/C Repair Near Me Santa Ana, CA
Rv Air Conditioning Repair Near Me Santa Ana, CA
Rv Repair Shops Santa Ana, CA
Rv Mechanic Santa Ana, CA
Rv Air Conditioner Repair Santa Ana, CA
Rv Windshield Replacement Santa Ana, CA
Rv A/C Repair Near Me Santa Ana, CA
Rv A/C Repair Near Me Santa Ana, CA
Rv Service And Repair Santa Ana, CA
Rv Service And Repair Santa Ana, CA
Rv Generator Repair Near Me Santa Ana, CA
Motorhome Generator Repair Santa Ana, CA
Rv Windshield Repair Near Me Santa Ana, CA
Rv Air Conditioner Repair Santa Ana, CA
Rv Windshield Replacement Santa Ana, CA
Rv Windshield Replacement Santa Ana, CA
Rv Windshield Repair Santa Ana, CA
Norcold Refrigerator Repair Santa Ana, CA
Rv Windshield Repair Santa Ana, CA
Dometic Refrigerator Repair Santa Ana, CA
Motorhome Generator Repair Santa Ana, CA
Onan Generator Repair Santa Ana, CA
Rv Air Conditioning Repair Near Me Santa Ana, CA
Rv Repair Shops Santa Ana, CA
Rv Mechanic Santa Ana, CA
Rv Mechanic Near Me Santa Ana, CA
Fiberglass Roof Repair Santa Ana, CA
Rv Engine Repair Near Me Santa Ana, CA
Around Me Seo Plans Santa Ana, CA
Companies Near Me Seo Services For Small Business Santa Ana, CA
OCRV Center
Rv A/C Repair Near Me Santa Ana, CA
Rv Repair Shops Santa Ana, CA
Table of Contents
- – OCRV Center
- – Why Is My RV AC Not Cooling Properly in Califo...
- – Common Causes of Poor Cooling in Motorhomes
- – Dirty Coils and Filters Blocking Airflow
- – Low Refrigerant from Leaks or Normal Wear
- – Signs Your Unit Needs Immediate Attention
- – Warm Air from Vents Instead of Cold
- – Unusual Noises or Frequent Short Cycling
- – How Do I Fix RV AC Blowing Warm Air?
- – Step-by-Step Troubleshooting at Home
- – Check Power Supply and Breaker Status First
- – Inspect, Clean, or Replace Air Filters
- – When to Call for Professional Help
- – Suspected Capacitor or Compressor Failure
- – What Causes RV AC Not Turning On?
- – Electrical and Thermostat Issues
- – Tripped Breakers or Loose Connections
- – Fuse and Control Board Problems
- – Common RV Air Conditioner Problems and Proven ...
- – RV AC Capacitor Failure Symptoms and Replacement
- – Safe Testing Methods
- – Typical Cost Range ($400–$1,200)
- – Refrigerant Recharge: When It's Needed and Why
- – Identifying Low Refrigerant Signs
- – RV Rooftop AC Maintenance: Essential Tips for ...
- – Coil Cleaning and Fin Straightening Techniques
- – Recommended Tools and Safety Precautions
- – Gasket, Shroud, and Seal Inspection
- – Preventing Water Intrusion and Leaks
- – Dometic vs Coleman Mach vs Furrion: Brand-Spec...
- – Dometic Common Repairs and Solutions
- – Control Board and Thermostat Calibration
- – Coleman Mach Troubleshooting and Fixes
- – Fan Motor and Capacitor Challenges
- – Furrion Modern Unit Maintenance Needs
- – Mobile RV AC Repair: Benefits for California M...
- – On-Site Diagnostics and Immediate Repairs
- – Eliminating Towing and Downtime
- – Emergency Service During Heat Waves
- – RV AC Repair Costs in California: What to Expect
- – Breakdown by Repair Type
- – Diagnostic and Minor Service Fees
- – Full System Replacement Considerations
- – Local RV AC Repair Near You: Serving Southern ...
- – Extensive Coverage in Key Areas
- – Why Choosing Local Experts Matters
- – We Can Help! Contact Us Today.
- – OCRV Center
Latest Posts
Pomona Rv Trailer Repair Shops Near Me
Silverado Rv Carpet Replacement
Atwood Rv Collision Repair Near Me
More
Latest Posts
Pomona Rv Trailer Repair Shops Near Me
Silverado Rv Carpet Replacement
Atwood Rv Collision Repair Near Me