All Categories
Featured
Table of Contents
- – Painting Rv Santa Ana, CA
- – OCRV Center
- – Painting An Rv Santa Ana, CA
- – Rv Paint Shops Near Me Santa Ana, CA
- – Rv Painting Near Me Santa Ana, CA
- – Rv Exterior Paint Santa Ana, CA
- – Rv Paint Santa Ana, CA
- – Painting Rv Walls Santa Ana, CA
- – Painting Rv Santa Ana, CA
- – Motorhome Painting Santa Ana, CA
- – Painting An Rv Santa Ana, CA
- – Motorhome Paint Repair Santa Ana, CA
- – Rv Paint Job Santa Ana, CA
- – Motorhome Custom Paint Santa Ana, CA
- – OCRV Center
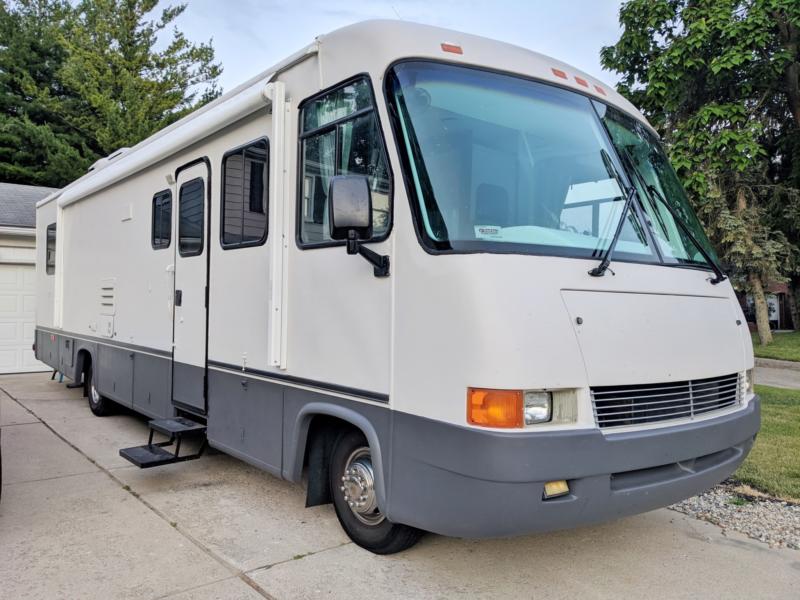
Painting Rv Santa Ana, CA
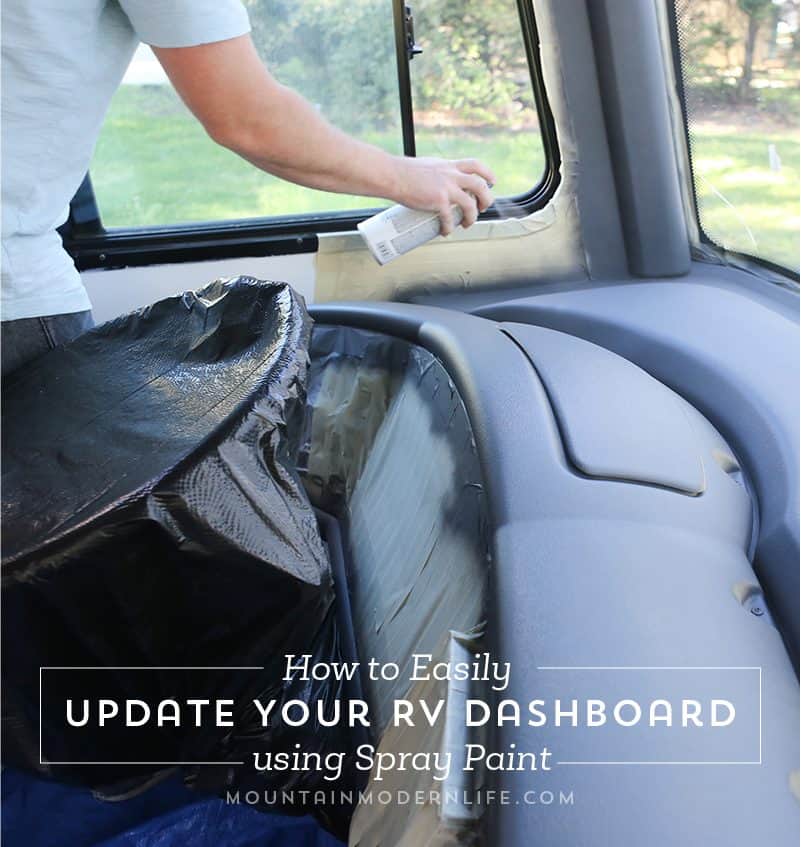
Get your surface as also as feasible. Tape off any type of components or trim with painters tape. We didn't require to prime independently due to the fact that the paint we selected was 2-in-1.
Go slow and come back to it the following day if you have to. Just do not relocate the projector till you're done! This is one of the most enjoyable part. Okay, so exactly how is it standing up? This was my greatest interest in this task, so I intend to share reality pictures! One year later on, and I'm extremely happy with exactly how the paint is holding up.
You can see the small chips on the door (it's likewise VERY unclean from Alaska mud, but that's washable!): I truly hurt myself attempting to decide whether to repaint our RV outside, and I am SO grateful that we did. I enjoy it, and we obtain numerous praises. The way we did it may burn out the recreational vehicle exterior paint purists, yet I would certainly 100% do this once more.
Affiliate earnings assists money our family members traveling and allows me to keep developing motivating family members traveling material for you. I so appreciate when you utilize my links to make acquisitions you would have made anyhow (Santa Ana Custom Motorhome Paint Jobs). For even more RV improvement, here are a few other articles you might like:
Painting An Rv Santa Ana, CA
This cheap rate came with a deteriorating roofing! This summer, I lastly obtained around to giving the exterior a renovation as well with green and white paint and stenciled trees.
To cleanse the outside of a RV before painting, usage auto wash soap mixed with water and a large scrub brush. If you have a power washer, this will certainly likewise function well to clean up the exterior.
To remove the stickers, I have actually discovered that utilizing a warm gun and a spatula scratching device functions well (you could also have luck with a hair clothes dryer above warm as well!). Simply warm up the decal and afterwards scrape it off with the scrape. Make use of a great quality steel wool dipped in mineral spirits to eliminate any excess gunk.
Rv Paint Shops Near Me Santa Ana, CA
To obtain as smooth of a surface as feasible, utilize 80 grit sandpaper (utilizing an orbital-sander here would be optimal, however you can hand sand it as well) and sand along the edges of the decals. This will certainly eliminate any fly-away stickers and provide a smoother transition between camper and sticker when paint over them.
When repainting the exterior of a camper I would highly suggest one coat of primer before painting. Zinsser Bulls Eye 1-2-3 Plus Primer is an economical guide that works well for a lot of basic priming needs. It works with inside and exterior applications and can be used under both water-based and oil-based paints.
I've checked out varying suggestions on this subject, so I had to base my choice on the advice of my daddy and my personal experience with a great deal of different sort of paint. Santa Ana Custom Motorhome Paint Jobs. My daddy has actually painted many vehicles, vehicles and equipment over the past couple of years, and his referral was to use oil-based paint
It applied and adhered really well. Various other choices that I have heard work well besides oil-based paint: vehicle paint (made particularly for this type of application, yet much a lot more pricey) Alkyd enamel paint (water-based) Two-Stage auto paint (I used this on my '65 Shasta camper) If you want a water-based paint, I would lean in the direction of utilizing an alkyd enamel paint.
Rv Painting Near Me Santa Ana, CA
Additionally, the majority of brands of alkyd paint can be made use of in exterior applications. If I opted for water-based rather of oil-based paint, this would have been the paint I would have used.
I have a sprayer and generally like spraying items, yet I made a decision to hand paint my little pop-up camper. (We'll see if I make this very same decision when I paint my larger traveling trailer!) I made use of a brush to reduce in the edges, and after that I rolled the remainder of the paint on the surface area.
Because oil-based paint can only be tidied up with paint thinner, I lined my paint tray with light weight aluminum foil to make clean up method much easier. To offer the pop-up camper a little something additional, I chose to split the paint to provide it a two-toned surface. After painting the entire camper in white, I added the green under.
Rv Exterior Paint Santa Ana, CA
If you just make use of painter's tape (even the most effective kind) several of the 2nd color will certainly bleed under the paint, and much more so when you're repainting on a rough surface (Santa Ana Custom Motorhome Paint Jobs). To help stop bleed with when paint lines, the technique it to adhere to these steps: Take down the painter's tape (and the only I ever before use)
(This seems counterintuitive, yet this permits the initial color to hemorrhage under the tape, forming a clean seam at the tape line.) As soon as that paint is completely dry, paint the brand-new, second color (eco-friendly) along the tape side and the remainder of the area. This will normally take two coats of paint.
Most of the paint seepage will be in the initial shade (white in my case). Due to the fact that of this, the green paint had nowhere to slip into!
Rv Paint Santa Ana, CA
I cut the pattern using my Silhouette, however there are so several choices for pre-cut patterns to purchase. If I had bought them rather than making them, You can see I didn't repaint the top of the camper. I probably ought to have, however then really did not navigate to it before deciding to offer it to include the brand-new to us hybrid camper we purchased.
Every one of these will certainly be coming soon!.
Today I desire to speak about painting motor home walls and cupboards! If you have a camper, new or old ... it possibly came out of the factory decorated in different beautiful tones of crap brownish, full with the ugliest wallpaper and material you imaginable. It's virtually like every one of the camper producers made a pact that all campers would be useful yet awful.
(My ideal guess is that brownish hides dust far better and does not need as much cleaning?) When we started seeking a camper, I knew that the very first job I would certainly tackle would be repainting the recreational vehicle walls and cupboards. I'm highly opposed to phony, glossy plastic pretending to be timber ... so I would certainly have to cover it up ASAP.
Painting Rv Walls Santa Ana, CA
Initially glance, this was excellent due to the fact that I assumed they would certainly already tackled the hard component of the paint ... which is getting the paint to adhere to the wall surfaces. Nevertheless, after inspecting their workmanship. it was clear that they had just put the paint on with no prep work. This bring about the paint removing and looking really awful up close.
By the time I actually obtained to painting the motor home walls and cupboards, I 'd done a comprehensive quantity of study to ensure that I didn't screw it up. After really carrying out the project - I need to claim, it was actually truly simple and has made a HUGE difference in the vibe of my motor home.
It appeared to function well, but if you're repainting over the OG shiny timber walls or cabinet, I would certainly Painting is tedious, it's finest to the prep job right the first time! I made use of 80 grit sandpaper and a tool grit sanding block that I selected up at Rocky's Ace Hardwareand gently sanded all of the Recreational vehicle closets and walls.
Painting Rv Santa Ana, CA
(I really did not in fact do well at smoothing these components because the previous proprietor repainted over the peeling but, oh well!) If you're painting your RV wall surfaces and closets for the very first time, certainly ensure that you sand them down completely. This will be an additional advantage when it concerns keeping the paint from peeling.
(This may have been overkill however I'm realllllllly a huge mess). If I have one referral concerning taping ... it's to utilize top quality painters tape. I'm a massive proponent of acquiring things at the buck shop ... but good painters tape, in my point of view, is worth paying a little additional for.
Motorhome Painting Santa Ana, CA
Feel cost-free to take your time while taping off your motor home wall surfaces and cupboards. The more specific your insulation is, the much less concerns you'll have when you eliminate it after painting. When choosing paint and primer for your RV wall surfaces and cabinets ... it's really essential that you make use of 2 separate items.
If you avoid any kind of step in this procedure ... do not allow it be the primer. In every blog site message, facebook group and forum I've inspected ... this has been the product that they swear by.
Painting An Rv Santa Ana, CA
Because we were uncovering and dealing with substantial water damage concerns when I was preparing to paint ... I chose to use due to its mildew immune residential or commercial properties. I knew that I was taking a risk making use of a less glue primer, but the profession off seemed worth it at the time.
For my paint option, I picked a white semi-gloss latex paint from Ace Equipment (store brand, called Royal). I was initially planning on going with a water based paint, yet the Ace Hardware partner lead me towards the more affordable choice. (You know I loveee to conserve money!) I needed to use 2 layers (as anticipated) ...
Given that I completed painting, we've torn down and changed the ceiling. and I was able to easily wipe down the closets after to look as nice as they did when I initially repainted them. Sadly, since our camper has actually become an energetic construction website ... some of the paint has already been scuffed off by tools, and stray ply-wood.
however I figured it was worth pointing out! Apart from the damage we've already triggered to our recently repainted motor home ... I'm very pleased with the result. I never imagined paint my motor home wall surfaces and cabinets would certainly make such a huge difference in exactly how large my little camper really feels. Do not hurry! The outcome of your recreational vehicle interior paint job counts on your persistence in the primary phases.
Motorhome Paint Repair Santa Ana, CA
White, yellow and Tiffany blue have actually been my preferred Motor home indoor paint shades. (For instance: teal cabinets, white wall surfaces). We really did not pay enough focus in the priming phase and finished up with some noticeable drips that were dried right into the paint.
(This might have been overkill yet I'm realllllllly a big mess). If I have one recommendation regarding taping ... it's to use excellent quality painters tape. I'm a huge advocate of getting things at the buck shop ... however excellent painters tape, in my opinion, is worth paying a little additional for.
Rv Paint Job Santa Ana, CA
Feel cost-free to take your time while taping off your recreational vehicle walls and closets. The even more accurate your insulation is, the much less problems you'll have as soon as you remove it after paint. When selecting paint and guide for your recreational vehicle walls and cabinets ... it's truly essential that you make use of 2 separate products.
If you avoid any kind of action in this process ... do not allow it be the primer. I promise you'll regret it. Based on my considerable study, Glidden Gripper Primer is like the divine grail of recreational vehicle interior primers. In every blog post, facebook team and online forum I have actually examined ... this has actually been the product that they speak highly of.
Because we were finding and taking care of considerable water damage concerns when I was preparing to repaint ... I chose to utilize since of its mildew immune homes. I recognized that I was taking a danger making use of a less adhesive primer, but the profession off seemed worth it at the time.
Motorhome Custom Paint Santa Ana, CA
For my paint choice, I picked a white semi-gloss latex paint from Ace Hardware (store brand name, called Royal). I was at first preparing on going with a water based paint, but the Ace Equipment associate lead me towards the less costly option. Considering that our camper has ended up being an energetic building and construction website ... some of the paint has currently been scuffed off by devices, and roaming ply-wood.
I figured it was worth mentioning! Various other than the damages we have actually already created to our freshly painted recreational vehicle ... I'm super pleased with the end result. I never visualized painting my RV wall surfaces and cabinets would certainly make such a huge distinction in just how roomy my tiny camper really feels. Don't rush! The result of your recreational vehicle indoor paint work depends on your patience in the primary stages.
White, yellow and Tiffany blue have actually been my preferred RV interior paint shades. (For example: teal closets, white walls). We didn't pay adequate interest in the priming phase and finished up with some noticeable drips that were dried out into the paint.
Rv Paint And Repair Santa Ana, CAPainting Fiberglass Motorhome Santa Ana, CA
Painting An Rv Santa Ana, CA
Rv Exterior Paint Santa Ana, CA
Rv Exterior Paint Santa Ana, CA
Painting Fiberglass Motorhome Santa Ana, CA
Painting Rv Exterior Santa Ana, CA
Custom Rv Paint Santa Ana, CA
Custom Rv Paint Jobs Santa Ana, CA
Painting Rv Walls Santa Ana, CA
Rv Painting Near Me Santa Ana, CA
Motorhome Painting Santa Ana, CA
Motorhome Paint Shops Santa Ana, CA
Rv Paint Repair Santa Ana, CA
Rv Exterior Paint Santa Ana, CA
Rv Paint Repair Santa Ana, CA
Motorhome Custom Paint Santa Ana, CA
Painting An Rv Santa Ana, CA
Custom Rv Paint Santa Ana, CA
Paint Fiberglass Rv Santa Ana, CA
Painting An Rv Santa Ana, CA
Paint Fiberglass Rv Santa Ana, CA
Rv Paint And Repair Santa Ana, CA
Motorhome Custom Paint Santa Ana, CA
Motorhome Paint Shops Santa Ana, CA
Custom Motorhome Paint Jobs Santa Ana, CA
Motorhome Paint Shops Santa Ana, CA
Rv Paint Santa Ana, CA
Rv Paint And Body Shops Near Me Santa Ana, CA
Rv Paint Repair Santa Ana, CA
Custom Motorhome Paint Jobs Santa Ana, CA
Custom Motorhome Paint Jobs Santa Ana, CA
Motorhome Paint Shops Santa Ana, CA
Motorhome Paint Repair Santa Ana, CA
Class A Rv Custom Paint And Repair Santa Ana, CA
Rv Paint And Repair Santa Ana, CA
Motorhome Paint Repair Santa Ana, CA
Paint Motorhome Exterior Santa Ana, CA
Class A Rv Custom Paint And Repair Santa Ana, CA
Rv Painting Near Me Santa Ana, CA
Motorhome Paint Shops Santa Ana, CA
Rv Paint Job Santa Ana, CA
Paint Rv Santa Ana, CA
Paint Rv Santa Ana, CA
Rv Painter Santa Ana, CA
Painting An Rv Santa Ana, CA
Paint Rv Santa Ana, CA
Painting Rv Exterior Santa Ana, CA
Rv Paint Repair Santa Ana, CA
Rv Exterior Paint Santa Ana, CA
Painting An Rv Santa Ana, CA
Motorhome Painting Santa Ana, CA
Motorhome Paint Shops Santa Ana, CA
Rv Paint Job Santa Ana, CA
Painting Rv Exterior Santa Ana, CA
Custom Rv Paint Jobs Santa Ana, CA
Rv Paint Repair Santa Ana, CA
Painting Fiberglass Motorhome Santa Ana, CA
Rv Paint And Repair Santa Ana, CA
Painting Rv Santa Ana, CA
Motorhome Paint Shops Santa Ana, CA
Motorhome Painting Santa Ana, CA
Painting Rv Walls Santa Ana, CA
Paint Rv Santa Ana, CA
Rv Painting Santa Ana, CA
Custom Motorhome Paint Jobs Santa Ana, CA
Painting Rv Santa Ana, CA
Motorhome Paint Shops Santa Ana, CA
Rv Painter Santa Ana, CA
Rv Painter Santa Ana, CA
Motorhome Paint Repair Santa Ana, CA
Rv Paint Santa Ana, CA
Painting An Rv Santa Ana, CA
Motorhome Paint Repair Santa Ana, CA
Rv Paint And Body Shops Near Me Santa Ana, CA
Class A Rv Custom Paint And Repair Santa Ana, CA
Rv Paint Job Santa Ana, CA
Painting Rv Exterior Santa Ana, CA
Companies Near Me Seo Company Santa Ana, CA
Near Seo Company Near Me Santa Ana, CA
OCRV Center
Table of Contents
- – Painting Rv Santa Ana, CA
- – OCRV Center
- – Painting An Rv Santa Ana, CA
- – Rv Paint Shops Near Me Santa Ana, CA
- – Rv Painting Near Me Santa Ana, CA
- – Rv Exterior Paint Santa Ana, CA
- – Rv Paint Santa Ana, CA
- – Painting Rv Walls Santa Ana, CA
- – Painting Rv Santa Ana, CA
- – Motorhome Painting Santa Ana, CA
- – Painting An Rv Santa Ana, CA
- – Motorhome Paint Repair Santa Ana, CA
- – Rv Paint Job Santa Ana, CA
- – Motorhome Custom Paint Santa Ana, CA
- – OCRV Center
Latest Posts
Rv Trailer Service Near Me Diamond Bar
Jurupa Valley Internet Marketing And Seo Services
Yorba Linda Internet Marketing Services Electricians
More
Latest Posts
Rv Trailer Service Near Me Diamond Bar
Jurupa Valley Internet Marketing And Seo Services
Yorba Linda Internet Marketing Services Electricians