All Categories
Featured
Table of Contents
- – Camper Floor Repair Near Me Villa Park, CA
- – OCRV Center
- – Travel Trailer Window Replacement Villa Park, CA
- – Trailer Windows Replacement Villa Park, CA
- – Trailer Restoration Villa Park, CA
- – Rv Travel Trailer Repair Near Me Villa Park, CA
- – Trailer Restoration Villa Park, CA
- – Trailer Window Replacement Villa Park, CA
- – Fifth Wheel Service Villa Park, CA
- – Trailer Roof Repair Villa Park, CA
- – Rv Trailer Repair Shops Near Me Villa Park, CA
- – Travel Trailer Siding Repair Villa Park, CA
- – Horse Trailer Repairs Villa Park, CA
- – Travel Trailer Window Replacement Villa Park...
- – OCRV Center
Camper Floor Repair Near Me Villa Park, CA
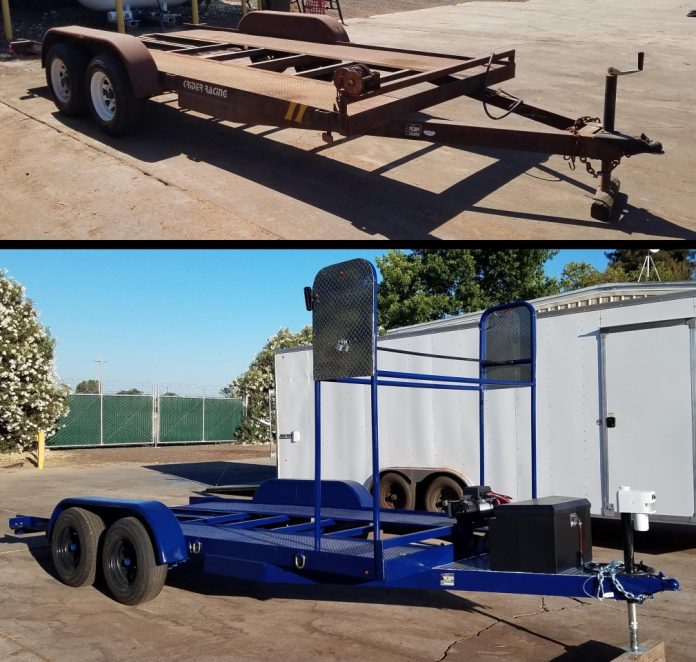
I got the trailer home and pressed it in my garage. Time to obtain to work! The majority of the timber was connected to the trailer with old corroded screws.
I wound up making use of a crowbar to eliminate the timber. Every one of the plywood was effectively gotten rid of. What a mess! Remove any type of rusted screws and stuck screws utilizing an angle grinder with a steel cutoff blade. Be very mindful and ensure to wear security security. Sweep and scuff all the dust and gunk out of the trailer structure.
Travel Trailer Window Replacement Villa Park, CA
I made use of 120 grit sandpaper. When the framework has actually been sanded, eliminate lights if needed and tape off locations you do not desire painted.
For information about re-wiring please look into my 510 trailer bring back job. Substitute lights and circuitry sets can be discovered on Amazon. The trailer is currently prepped for paint. Use enamel spray paint to make your trailer look like new. I used gloss black spray paint made by Rustoleum. I normally repaint all metal surfaces, also beneath.
Trailer Windows Replacement Villa Park, CA
Since it is a simply a trailer, I merely spray repainted the rims with white. To secure the wheels from overspray you can tape them off.
Pin it This is what the trailer looked like after completing all of the paint. I attached the side boards using 2 1/4 inch bolts.
Trailer Restoration Villa Park, CA
Vintage Trailer Talk is an area to see, go over, and post subjects associated with all points vintage trailer. If you would certainly such as to end up being a member of Vintage Trailer Talk, we ask that our participants comply with the Online forum Policies in order to ensure a pleasurable experience for everyone. Please make the effort to Register and we want to here from you soon.
I'm a lil shocked out of all of those who chose one up, none have actually come back with point of views - Rv Trailer Repair Shops Near Me Villa Park. I just browsed the "totally free copy". I assume somebody made a decent initiative to share what they had actually learned with I assume it is an inadequate influence on those new trailer owners that desire to "do it appropriate" and in fact bring back a trailer
The structures on these trailers weren't that solid. I differ with having individuals believe they can make mold and mildew and rot "go away" by covering and or concealing it.
What of the new individual hooked on the vintage trailer ownership concept that purchases among these plagued trailers assuming it is "brought back"? Exactly how lots of individuals are tricked yearly right into buying one by a seller that understands full well the condition, however deceives to make an (unreasonable) profit. Much, no one has actually been harmed that I have actually listened to by one of these "covered with each other" trailers degenerating while running down the highway, but one day it will certainly occur, ideally not while in front of a person you care about.
Rv Travel Trailer Repair Near Me Villa Park, CA
To those that simply wish to deal with an old trailer and not "restore it", not a problem, it can be an excellent way to appreciate a trailer on a spending plan, however make certain you do it safely - Rv Trailer Repair Shops Near Me Villa Park. The old expression that goes something like; Approving without question suggestions provided by a person trying to market you something is frequently a dangerous road to take a trip
I had the chance to photograph a vintage trailer at the beginning of its repair process. Can anyone inform me what it is from these images? Just how do you affix photos to this?
Trailer Restoration Villa Park, CA
Howdy. Currently obtain prepared to hold onto something, this crazy undertaking can be a thrilling adventure! I don't have a lot of time to publish now, to address your inquiries all in deepness, yet let's simply state, "start below: "You will find several videos of all different stages of trailer reconstruction there, right to the nuts and screws of the building and construction of these old jobs.
Traveling trailers are not constructed like residences are. Real quick one more thing . Openings via the wall surfaces and roof need to be secured around components using putty tape.
Trailer Window Replacement Villa Park, CA
Remember we are below to aid, and anything that seems like criticism is just that, crucial analysis, and nothing individual. Most of all, have fun!.
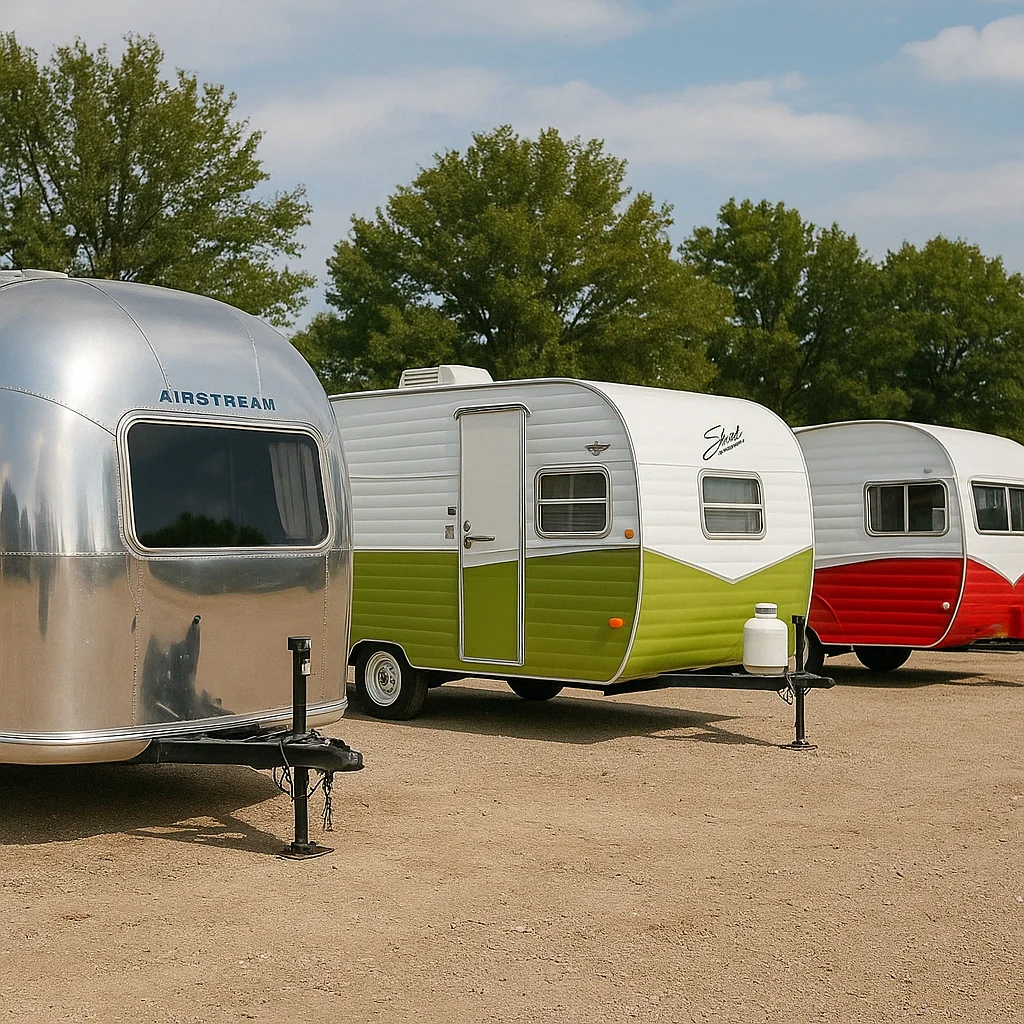
If you have actually ever seen The Long, Long, Trailer with Lucille Ball and Desi Arnez, you understand the charm of the vintage trailer. There's something concerning seeing a completely restored piece of the past that reverberates with people around the world. Naturally, there's a huge difference between appreciating a refurbished vintage trailer, and doing the real remodelling.
Fifth Wheel Service Villa Park, CA
Instantly that desire trailer has become a cash sucking maker. To recover a vintage trailer you have to have passion or else your opportunity of sticking it out through the effort is slim. Fortunately some individuals have the passion and drive that it takes to do the job. Enter Justin Scribner of Flyte Camp Vintage Trailer Renovations.
Flyte Camp, situated in Bend, Oregon focuses on restoring traveling trailers from the 1930s through the '50s. Justin Scribner comprehends the disappointment of the ordinary retro trailer purchase.
Flyte Camp is in high demand as one of the only companies in the United States that expertly restores vintage Recreational vehicles. People all over the globe ship their vintage treasures to Flyte Camp for a renovation.
If that's insufficient, it shows up that Flyte Camp will soon be the subject of their own reality television show. Target markets will follow Justin and he pursues for the ideal restoration jobs. One of things that makes Flyte Camp stand apart from the pack is their level of research.
Trailer Roof Repair Villa Park, CA
They aim to recognize the initial trailer before recovering it to its former glory. Anther point that Flyte Camp concentrates on is information such as woodwork. Unlike the Motor homes of today, many timeless trailers include lovely wood insides. This, of training course, includes to the job. It takes a great deal of time to bring back antique and usually maltreated wood.
What does a brought back trailer price? The Scribners acquired vintage trailer for a plain $2,400 an offer?
Rv Trailer Repair Shops Near Me Villa Park, CA

When you add up all the time and energy, you require to love the work or it's barely worth it. Over time he established an enthusiasm for mid century trailers and purchased one to give bring back a whirl.
The trailer came to be a normal fixture in the Scribner's driveway. Justin functioned on it when he had time.
In time, he dominated his first remediation, and his better half Anna joined him in his new discovered enthusiasm. The couple began to camp with their trailer taking brief weekends away. They played old time documents and discovered to turn dance. There was something enchanting about going back in time. By the time they offered the Shasta they were done in.
Travel Trailer Siding Repair Villa Park, CA
Today, Flyte Camp has 6 staff members and a 7,000 square foot store. They work on several units at a time and tackle whatever from interior design to pipes.
While Airstream obtain's a great deal of press, Flyte Camp is all regarding the early age trailers from 1935-1945. This was the height of the commercial design in the US and several believe these trailers are really an artwork. Despite the financial depression that brushed up the country around this moment duration, several family members retained enough cash to acquire luxuries in life.
Horse Trailer Repairs Villa Park, CA
These trailers were generally developed in the shape of a bread loaf and provided a tin roofing system with masonite siding. High design was king and the indoor designs were created with trendy interiors like you might find on an excellent train. Much of the trailers featured dark walnut or cherry wood with hand carved moldings and artistic tile work.
In the 1940s the episode of World Battle II stopped traveling trailer production. When the battle was over, traveling trailers were hotter than ever.
Every item of the trailer was done by hand without a pushing timetable. They took the time to make points. Roadway travel was still in its early stage and making individuals pleased was these building contractor's main concerns.
At Flyte Camp they make every piece of the repair by hand. A reconstruction normally includes removing the trailer shell, stripping out the electric and identifying the condition of the structure and interior panels.
Travel Trailer Window Replacement Villa Park, CA
When Flyte Camp agrees to a project they do their finest to bring the trailer back to its initial magnificence. There's something magical concerning saving bringing an old trailer back to life.
You can restore it yourself. From framework to the roofing system, the trailer needed severe aid. Within a few weeks they understand that they were out of their organization.
OCRV Center
Address: 23281 La Palma Ave Yorba Linda, CA 92887Phone: (714) 909-1444
Email: [email protected]
OCRV Center
Eric Sande figured out by hand that recovering a classic trailer is not a weekend break project. Eric called Flyte Camp to ask for assistance. $25,000 later the "tinned pork" design trailer was done. "I originally assumed, 'Gee, if I spend $8,000 to $10,000 perhaps it will certainly be worth something,'" recalls Sande.
Rv Trailer Repair Near Me Villa Park, CATravel Trailer Roof Replacement Villa Park, CA
Camper Trailer Service Villa Park, CA
Travel Trailer Repairs Villa Park, CA
Rv Trailer Repair Shops Near Me Villa Park, CA
Camper Trailer Service Villa Park, CA
Travel Trailer Repairs Villa Park, CA
Rv Trailer Repair Shops Near Me Villa Park, CA
Travel Trailer Furniture Villa Park, CA
Camper Trailer Service Villa Park, CA
Horse Trailer Repair Near Me Villa Park, CA
Fifth Wheel Repair Near Me Villa Park, CA
Travel Trailer Window Replacement Villa Park, CA
Trailer Restoration Villa Park, CA
Rv Trailer Repair Shops Near Me Villa Park, CA
Trailer Awning Replacement Villa Park, CA
Travel Trailer Roof Replacement Villa Park, CA
Cargo Trailer Repair Villa Park, CA
Travel Trailer Replacement Windows Villa Park, CA
Fifth Wheel Service Villa Park, CA
Rv Trailer Repair Near Me Villa Park, CA
5th Wheel Repair Near Me Villa Park, CA
Rv Trailer Repair Near Me Villa Park, CA
Travel Trailer Window Replacement Villa Park, CA
5th Wheel Repair Near Me Villa Park, CA
Trailer Window Replacement Villa Park, CA
Rv Trailer Repair Shops Near Me Villa Park, CA
Travel Trailer Furniture Villa Park, CA
Fifth Wheel Service Villa Park, CA
Trailer Windows Replacement Villa Park, CA
Rv Trailer Repair Shops Near Me Villa Park, CA
Camper Floor Repair Near Me Villa Park, CA
Travel Trailer Repairs Villa Park, CA
Fifth Wheel Repair Near Me Villa Park, CA
Camper Floor Repair Near Me Villa Park, CA
Travel Trailer Ceiling Repair Villa Park, CA
Rv Trailer Repair Shop Villa Park, CA
Trailer Awning Replacement Villa Park, CA
5th Wheel Repair Near Me Villa Park, CA
Trailer Window Replacement Villa Park, CA
Rv Travel Trailer Repair Near Me Villa Park, CA
Travel Trailer Awning Replacement Villa Park, CA
Cargo Trailer Repair Villa Park, CA
Trailer Floor Repair Villa Park, CA
Fifth Wheel Service Villa Park, CA
Travel Trailer Window Replacement Villa Park, CA
Camper Floor Repair Near Me Villa Park, CA
Trailer Windows Replacement Villa Park, CA
Travel Trailer Furniture Villa Park, CA
Rv Trailer Repair Near Me Villa Park, CA
Fifth Wheel Repair Near Me Villa Park, CA
Fifth Wheel Repair Near Me Villa Park, CA
Rv Trailer Repair Near Me Villa Park, CA
Travel Trailer Ceiling Repair Villa Park, CA
Travel Trailer Floor Repair Villa Park, CA
Rv Trailer Repair Shops Near Me Villa Park, CA
Travel Trailer Awning Replacement Villa Park, CA
Rv Trailer Service Near Me Villa Park, CA
Camper Trailer Service Villa Park, CA
Travel Trailer Awning Replacement Villa Park, CA
Cargo Trailer Repair Villa Park, CA
Travel Trailer Ceiling Repair Villa Park, CA
Travel Trailer Floor Repair Villa Park, CA
Fifth Wheel Repair Near Me Villa Park, CA
Trailer Roof Repair Villa Park, CA
Travel Trailer Siding Repair Villa Park, CA
Cargo Trailer Repair Villa Park, CA
Rv Trailer Repair Near Me Villa Park, CA
Travel Trailer Floor Repair Villa Park, CA
Travel Trailer Ceiling Repair Villa Park, CA
Horse Trailer Repair Near Me Villa Park, CA
Travel Trailer Ceiling Repair Villa Park, CA
Camper Trailer Service Villa Park, CA
Camper Floor Repair Near Me Villa Park, CA
Travel Trailer Window Replacement Villa Park, CA
Camper Floor Repair Near Me Villa Park, CA
Cargo Trailer Repair Villa Park, CA
Fifth Wheel Repair Near Me Villa Park, CA
Find A Good Local Seo Citations Villa Park, CA
Near Me Seo Specialist Villa Park, CA
OCRV Center
Table of Contents
- – Camper Floor Repair Near Me Villa Park, CA
- – OCRV Center
- – Travel Trailer Window Replacement Villa Park, CA
- – Trailer Windows Replacement Villa Park, CA
- – Trailer Restoration Villa Park, CA
- – Rv Travel Trailer Repair Near Me Villa Park, CA
- – Trailer Restoration Villa Park, CA
- – Trailer Window Replacement Villa Park, CA
- – Fifth Wheel Service Villa Park, CA
- – Trailer Roof Repair Villa Park, CA
- – Rv Trailer Repair Shops Near Me Villa Park, CA
- – Travel Trailer Siding Repair Villa Park, CA
- – Horse Trailer Repairs Villa Park, CA
- – Travel Trailer Window Replacement Villa Park...
- – OCRV Center
Latest Posts
Senior Health Insurance Placentia
Estate Planning Life Insurance Villa Park
Term Insurance For Senior Citizens Brea
More
Latest Posts
Senior Health Insurance Placentia
Estate Planning Life Insurance Villa Park
Term Insurance For Senior Citizens Brea