All Categories
Featured
Table of Contents
- – Rv Frame Repair Villa Park, CA
- – OCRV Center
- – Best Rv Collision Repair Near Me Villa Park, CA
- – Rv Auto Body Repair Near Me Villa Park, CA
- – Rv Paint And Body Repair Villa Park, CA
- – Rv Body Repair Shops Near Me Villa Park, CA
- – Rv Collision Repair Shops Near Me Villa Park...
- – Rv Paint Shops Villa Park, CA
- – Rv Body Repair Shop Near Me Villa Park, CA
- – Rv Paint And Body Repair Villa Park, CA
- – Rv Collision Repair Villa Park, CA
- – Rv Wall Repair Villa Park, CA
- – Rv Body And Paint Repair Villa Park, CA
- – OCRV Center
Rv Frame Repair Villa Park, CA
At Interstate RV Steel and Supply, we provide a wide variety of competitively priced, custom-made recreational vehicle devices and supplies. We are devoted to finish client satisfaction - Rv Body Shop Repair Near Me Villa Park. This commitment is shown in our item quality, our strategy to service, and our growing listing of loyal, satisfied customers
Required to fix a tiny section of your rv's wall surface or roof covering, however do not desire (or demand) to cost a fortune? An easy slit, break, split, or dent isn't something you replace an entire roof covering or wall surface for. Like the old stating goes, "Do not throw the child out with the bathwater".
If you require to repair your RV, look no additional! The shade of the repair work item is frozen white, which is tidy and neutral, wonderful for any kind of Motor home shade.
The size of the repair service patch has to do with 1 foot by 1 foot, nonetheless, they are reduced from a master roll, suggesting they will be a little longer so that the client can reduce it to the exact length and size of the location they need. There show up fibers and the piece is easy to form.
Best Rv Collision Repair Near Me Villa Park, CA
Have a place that could make use of some aid and you don't intend to obtain a massive plate of filon for simply that place? This repair service patch is what you require. Have any kind of inquiries? Call us online or call our friendly Client Care group today!.
This site makes use of cookies to assist personalise web content, customize your experience and to maintain you logged in if you sign up. By remaining to utilize this website, you are granting our use of cookies.
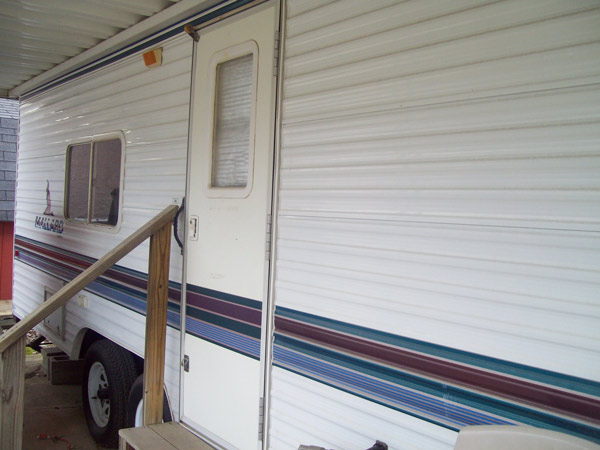
Consider the wall from an angle and look for bulges or bubbles. The majority of sidewalls are not perfectly flat, so this can be complicated, nevertheless, the bubble can be worse when the wall surface is in direct sunshine as a result of the de-bonded material broadening at various prices. Next off, faucet lightly on the wall with a plastic screwdriver manage, strong locations and peeled locations appear various.
Rv Auto Body Repair Near Me Villa Park, CA
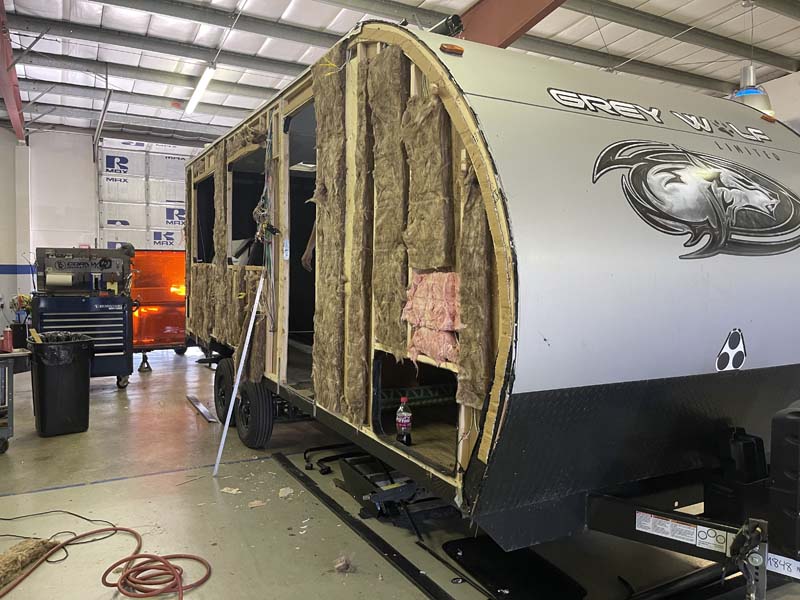
Our set is a device created for usage in RV side wall delamination repair work that needs to potential to repair or improve delaminated wall surfaces, floors, and roofs. Oftentimes a leak path opens enabling water to get in the wall. Generally this occurs beside windows, vents, lights, roof covering lines, and so on.
We normally see a situation where water breaks down the adhesive that bonds the layers of the Luann plywood. Will your items repair peeled fiberglass home siding on my RV? Delamination takes place when the bond in between one or even more layers falls short. This can happen in isolated areas, or throughout the entire wall surface panel.
The products are bonded together to form a COMPOUND STRUCTURE. How can you identify wall delamination? Motor home being fixed.
Rv Paint And Body Repair Villa Park, CA
The following pictures demonstrate the procedures for a very simple sheet metal home siding repair work task. The majority of repair work are not this simple or easy ... different windows, doors, areas and other opening will certainly make complex points as will certainly the length of the required metal sheets. Eight foot long sheets can be taken care of by a couple of people, but sheets of 20 or even more feet in length will certainly need 3 or four helpers and terrific care need to be required to prevent harming the metal as it is mounted.
The leading two panels are harmed and will be replaced with brand-new coordinating sheet metal. Get rid of the 2 side mouldings and the leading moulding if there is one ... and the clearance lights. Pop off the clearance light lenses and get rid of the 2 screws - tear up the light assembly and remove the internal light bulb setting up by turning it 1/4 turn.
Rv Body Repair Shops Near Me Villa Park, CA
Eliminate the staples holding the motor home house siding metal on - depending upon the building and construction used, the sheet metal may be folded over and stapled from the side over the back, or from the back over the side steel. Make sure not to damage or mark the undamaged panels! Straighten the folded up metal utilizing a putty blade and hammer.
The motor home house siding sheets are mounted one at a time from the top down at the manufacturing facility. The lower side of each sheet has a "lock" or folded part that permits the sheet to be stapled at the edges and at every upright stud in the wall surface. The top of the next sheet is put into the lock and after that that sheet is stapled on as defined over.
In order to save time, it is typically possible to "pop" out a sheet as revealed here and in the picture over. Extreme care has to be required to guarantee that this sheet is not wrinkled or spoiled by this operation. This allows the 2 damaged sheets above to be replaced without eliminating all the sheets on the wall.
Rv Collision Repair Shops Near Me Villa Park, CA
The replacement sheet will certainly be stapled in this placement to ensure that it will appropriately align with the reduced sheet. The staples holding the bottom of the damaged panel are currently obtainable and can be eliminated at this time ... This photo reveals the first broken panel gotten rid of from the trailer ...
This photo reveals both the leading 2 motor home home siding panels got rid of. The brand-new steel sheets are shipped in a dog crate to avoid shipping damage. Often the crating and shipping fees are much more than the price of the metal! The old sheet is meticulously laid over the new sheet in order to map out the shape needed and also the areas of the clearance light accessibility holes ... The shape of the leading contour is trimmed using tin snips ... and an opening saw is utilized to drill out the gain access to holes for the clearance lights ... The sheet is trimmed and ready to be mounted ... and after that stapled into setting making use of the arrow marks for right positioning ... Clearance lights and mouldings are re-installed using brand-new putty tape and the decal will be used at a later time.
Rv Paint Shops Villa Park, CA
If you're new to the RV globe, you might have listened to of the dreaded Recreational vehicle delamination. Recognizing what Motor home delamination is, exactly how to repair it, and exactly how to stop it is vital for every proprietor to understand.
Delamination usually leads to distorted siding, gurgled wall surfaces, and water damages. Fortunately, there are ways to repair this trouble or avoid it from taking place.
Rv Body Repair Shop Near Me Villa Park, CA
We currently covered the fundamentals above, however if you want to recognize exactly how to repair and avoid delamination, it's crucial to understand how it occurs. Band-aid solutions will not repair anything in the lengthy term if you do not obtain at the origin of the trouble.
In the case of RVs, lamination refers to the construction of the siding. If the plywood starts to come loose from the external layers, that's where Motor home delamination begins.
If water or particles leaks into these openings, this can accelerate the procedure. Mold can start to expand inside the walls and the external layer will start to establish bubbles and irregularities. If you see a recreational vehicle with distorted siding, it's in a state of delamination. Despite the fact that this may feel like a cosmetic issue, delamination is a huge problem for RVs.
Rv Paint And Body Repair Villa Park, CA
Delamination compromises the framework of your automobile, invites water damages, and can lead to persistent developments of mold and mildew. Having a rough exterior can also make your RV much less aerodynamic.
An additional method to test is by tapping the siding and paying attention to see if it appears hollow. If any kind of part of the exterior siding feels spongy, that's a telltale sign. Be especially cautious to look for delamination if you're buying a used motor home. If the recreational vehicle delamination is also severe, it can be tough to fix.

However if you catch it at an early stage, there are things you can do to repair this issue. Serious motor home delamination is difficult to repair, specifically if water damage has embeded in. If the plywood has actually started to rot, the only way to repair it is to entirely remove down the wall surfaces and replace them with a fresh framework.
If the procedure has actually only simply started and hasn't obtained as well much, there are a couple of repairs that proprietors can attempt. The initial alternative is a delamination repair work package. These expense about $80-150 and come with a high-strength bonding agent. This can be made use of to reseal the fiberglass to the underlying layers of the recreational vehicle.
Rv Collision Repair Villa Park, CA
A lot of kits also come with syringes that can be utilized to load hard-to-reach places. As soon as you're satisfied with the level of fixing you have actually done, it is very important to seal up any kind of splits and joints in the recreational vehicle outside. Using a great caulk is vital, and you can supply an extra layer of security by utilizing a protective recreational vehicle wax/coating.
Lots of people locate that these fixings are not worth the cost and give up the RV as a shed reason. Some Motor home owners with a whole lot of devices, time, and expertise have actually been effective at repairing delamination damage by themselves, but this is unwise for many individuals.
With any kind of good luck, you'll never have to deal with RV delamination in the first location. The majority of Recreational vehicles are reliable and can stand up to the damage of a life on the road. Delamination is definitely something to be conscious of, yet it's not a risk that every RV proprietor deals with.
Rv Wall Repair Villa Park, CA
The major cause of delamination is splits or seams in the exterior that let water in. You need to additionally take procedures to keep your Motor home tidy and dry.
The more security you can give the surface, the far better your possibilities are of avoiding RV delamination. Make sure you track all your recreational vehicle maintenance and repairs with an on-line device such as RV LIFE Upkeep from RECREATIONAL VEHICLE LIFE. Not only can you keep every one of your papers in one area, however you'll also get timely tips when upkeep results from help you stay clear of pricey repair work and possibly significant crashes.
Rv Body And Paint Repair Villa Park, CA
Hi all - initial time travel trailer proprietor below (Imagine 2500RL 2023). I made a bonehead rookie relocation this weekend break. Was mounting TV install in bedroom and used lag screws that were also long and all 5 of them punched out the exterior sidewall. The openings are little so for currently I plugged them with white and black water-proof silicon.
INQUIRY: I purchased from a dealership that has a service center nearby. Anyone had a similar circumstance and has even more of a career outside home siding repair service procedure. Many thanks.
Rv Fiberglass Siding Repair Villa Park, CAMotorhome Fiberglass Repair Villa Park, CA
Rv Siding Repair Villa Park, CA
Rv Fiberglass Siding Repair Villa Park, CA
Motorhome Body Repair Near Me Villa Park, CA
Rv Auto Body Repair Villa Park, CA
Rv Body Shop Repair Near Me Villa Park, CA
Rv Body Shop Repair Near Me Villa Park, CA
Rv Repair Body Shop Villa Park, CA
Rv Body Repair Shop Near Me Villa Park, CA
Rv Wall Repair Villa Park, CA
Motorhome Body Repairs Near Me Villa Park, CA
Motorhome Body Repair Near Me Villa Park, CA
Rv Frame Repair Villa Park, CA
Motorhome Collision Repair Near Me Villa Park, CA
Rv Collision Repair Near Me Villa Park, CA
Rv Body Work Villa Park, CA
Rv Paint And Body Repair Villa Park, CA
Rv Auto Body Repair Villa Park, CA
Rv Paint Shops Villa Park, CA
Rv Paint And Body Repair Villa Park, CA
Rv Body Repair Shop Near Me Villa Park, CA
Rv Collision Repair Near Me Villa Park, CA
Motorhome Body Repair Near Me Villa Park, CA
Rv Body And Paint Repair Villa Park, CA
Rv Paint Shops Villa Park, CA
Rv Body Shop Repair Near Me Villa Park, CA
Rv Collision Repair Villa Park, CA
Rv Body Shop Repair Near Me Villa Park, CA
Rv Paint And Body Repair Villa Park, CA
Rv Auto Body Repair Villa Park, CA
Rv Body Damage Repair Villa Park, CA
Rv Repair Body Shop Villa Park, CA
Rv Body Shop Villa Park, CA
Rv Body Damage Repair Villa Park, CA
Rv Collision Repair Shop Villa Park, CA
Motorhome Fiberglass Repair Villa Park, CA
Rv Collision Repair Villa Park, CA
Motorhome Full Body Paint Villa Park, CA
Rv Body Repair Shops Near Me Villa Park, CA
Rv Collision Repair Villa Park, CA
Rv Body Damage Repair Villa Park, CA
Rv Body Work Villa Park, CA
Motorhome Collision Repair Near Me Villa Park, CA
Rv Wall Repair Villa Park, CA
Rv Collision Repair Shops Near Me Villa Park, CA
Rv Body Repair Near Me Villa Park, CA
Rv Body Repair Shop Near Me Villa Park, CA
Rv Fiberglass Siding Repair Villa Park, CA
Rv Wall Repair Villa Park, CA
Rv Body Repair Near Me Villa Park, CA
Rv Frame Repair Villa Park, CA
Rv Siding Repair Villa Park, CA
Rv Fiberglass Repair Near Me Villa Park, CA
Rv Wall Repair Villa Park, CA
Motorhome Body Repair Near Me Villa Park, CA
Motorhome Body Shop Near Me Villa Park, CA
Rv Wall Repair Villa Park, CA
Rv Fiberglass Repair Near Me Villa Park, CA
Rv Body Shop Villa Park, CA
Rv Body Damage Repair Villa Park, CA
Motorhome Body Shop Near Me Villa Park, CA
Rv Slide Out Repair Near Me Villa Park, CA
Rv Body Repair Shop Near Me Villa Park, CA
Rv Collision Repair Shops Near Me Villa Park, CA
Rv Fiberglass Siding Repair Villa Park, CA
Rv Wall Repair Villa Park, CA
Rv Body Repair Near Me Villa Park, CA
Rv Siding Repair Villa Park, CA
Rv Body Shop Repair Near Me Villa Park, CA
Rv Collision Repair Shops Near Me Villa Park, CA
Rv Siding Repair Villa Park, CA
Rv Fiberglass Siding Repair Villa Park, CA
Rv Collision Repair Villa Park, CA
Motorhome Body Shop Near Me Villa Park, CA
Motorhome Full Body Paint Villa Park, CA
Rv Body Shop Villa Park, CA
Rv Collision Repair Near Me Villa Park, CA
In Seo Agency Villa Park, CA
Find A Good Local Seo Company Villa Park, CA
OCRV Center
Table of Contents
- – Rv Frame Repair Villa Park, CA
- – OCRV Center
- – Best Rv Collision Repair Near Me Villa Park, CA
- – Rv Auto Body Repair Near Me Villa Park, CA
- – Rv Paint And Body Repair Villa Park, CA
- – Rv Body Repair Shops Near Me Villa Park, CA
- – Rv Collision Repair Shops Near Me Villa Park...
- – Rv Paint Shops Villa Park, CA
- – Rv Body Repair Shop Near Me Villa Park, CA
- – Rv Paint And Body Repair Villa Park, CA
- – Rv Collision Repair Villa Park, CA
- – Rv Wall Repair Villa Park, CA
- – Rv Body And Paint Repair Villa Park, CA
- – OCRV Center
Latest Posts
Employee Benefits Company Laguna Hills
Commercial Swamp Cooler Repair Altadena
Evaporative Cooling Repair Near Me Los Angeles County
More
Latest Posts
Employee Benefits Company Laguna Hills
Commercial Swamp Cooler Repair Altadena
Evaporative Cooling Repair Near Me Los Angeles County